Monday, August 12, 2013

Italian Herb Bread

       After mastering recipes for naan and honey rolls, today I finally felt ready to bake an actual loaf of bread. I had done my research, I bought bread flour and fresh yeast, and I learned how to best control all of the variables involved in breadmaking that had previously given me trouble. Side note: For those of you who didn't know that there are different types of flour, you're not alone. Apparently bread flour just has a lot more gluten than regular flour. I picked a type of bread that's hard to mess up, and I'm happy to share that it turned out perfect! Although you could probably use an electric mixer to knead the dough, I found it more fitting to make this rustic bread the old-fashioned way. In total, this recipe took about 2.5 hours to prepare, but most of that time is just waiting for the dough to rise, so it didn't feel like a ton of work. So I'll do my best to describe how I got this result, but I know there are better breadmakers out there than me. It's a learning process for all of us, but after tasting this bread, I can definitely say that it's a worthwhile endeavor.

INGREDIENTS:
1 cup slightly warm water
1 packet quick rise yeast
1 tablespoon granulated sugar
1 teaspoon salt
a very little pinch each of dried basil, oregano, black pepper, and garlic powder
2 teaspoons dried rosemary, plus extra for the top
2 tablespoons olive oil, plus extra for the top
1 1/2 cups all-purpose flour
1/2 cup bread flour, plus about 1/4 cup extra to add at various stages of kneading
2 tablespoons cornmeal

DIRECTIONS:
1. In a large bowl, mix the yeast with the sugar and water and let it sit in a warm place for 5-10 minutes until it gets frothy.
2. Mix in 2 tablespoons of olive oil, 2 teaspoons of rosemary, and the salt, pepper, and other herbs.
3. Mix in the all-purpose flour 1/2 cup at a time. Then, mix in the bread flour.
4. Now, ditch the spoon and work the dough together with your well-floured hands. Spread some extra bread flour over a clean, dry surface and knead the dough for 5 minutes. The process of kneading is hard to describe, but the idea is to get all areas of the dough to have the same degree of stickiness and more importantly, to get air bubbles out. This bread dough is on the stickier side, but if pieces of it start to stick to your hands, you need to add more flour. Try not to add more than an additional 1/4 cup.
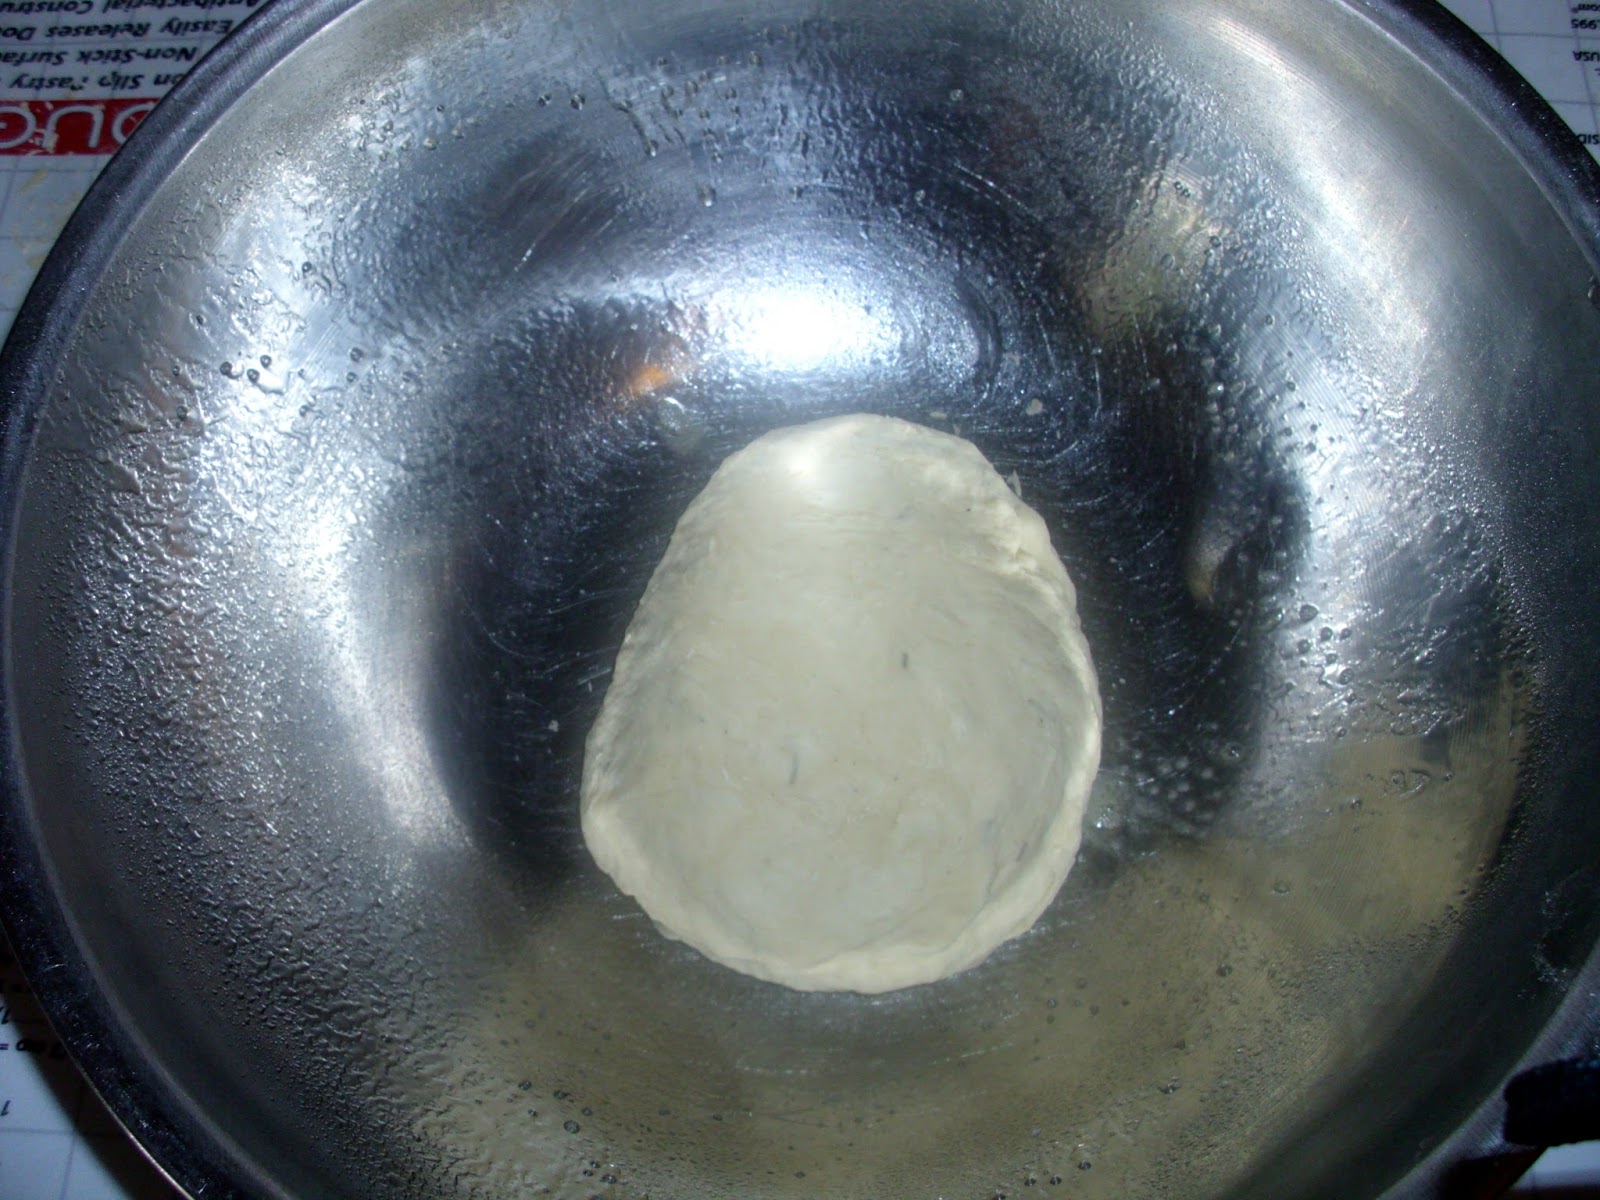
5. Form the dough into a ball with no cracks and place it in a large, clean, well-greased bowl. Cover it with a cloth and let it rise in a warm place for 1 hour. It'll more than double in size.

Before rising:

After rising:

6. Bread dough always needs to rise twice, so after 1 hour, punch the dough down, fold it in on itself a little, and form it into a ball again. This takes it back close to it's original size. Make sure it's completely smooth. 
7. Cover a cookie sheet with parchment paper, spread the cornmeal out over it, and place the dough ball on top. Maybe the cornmeal isn't absolutely necessary, but it gives it a texture like real bread. Cover the dough with the dishcloth again and let it rise for an additional hour. Preheat the oven to 400 when it gets close to done.

Before second rise:

After second rise:
8. After it's done rising, brush the top of the dough with a very little bit of olive oil, and sprinkle on some extra rosemary. If you have fresh, it would be even better for the top.
9. Bake at 400 for 25 minutes. The top will be crispy and the middle will be fluffy... again, just like real bread!
10. Let this cool for about 20-30 minutes before slicing, but it's of course best when it's still a little warm.
     

     Don't be intimidated, give this a try! Breadmaking is a skill to be patiently learned and mastered. It may seem old-fashioned, but homemade bread is better and probably much cheaper than store-bought. I realize that most people don't have time to do this every day, but if you'll be proud of yourself if you can make it once in a while. So enjoy, and come back tomorrow for peach upside-down cake!

Sunday, August 11, 2013

The World's Easiest and Healthiest Chocolate Chip Cookies

     After almost 3 months of daily recipes, I finally took a real day off without guilting myself into doing 2 posts the next day. My mom and I decided to be spontaneous and take a little road trip without having any plan or even a destination in mind. We did have a little fun, but unfortunately, spontaneity sounds better in theory than in reality. Who would have thought that EVERY hotel in an entire county could be full and that restaurants would even bother taking names for an hour and a half wait? Oh well, it was another live and learn experience. I've been having a lot of those lately. Here's a look at my adventure:

     Anyhoo, tonight I'm posting another one of my sunday night simple recipes. The inspiration for these fast and healthy cookies originally came from Pinterest, but I just glanced at the ingredients and didn't bother to read the directions, so the result is a totally original creation. They're sweet and chewy, but contain no butter, flour, sugar or eggs. Since they're made of mostly banana, the flavor and texture is obviously a little different than a regular cookie, but the definitely satisfy a sweet tooth. I just had 3 for dessert, and feel completely content with no guilt. In fact, these could probably even be great for breakfast! This recipe only makes 6 cookies, so feel free to multiply it to your heart's content, but I always try to make small batches because I'm not trying to feed an army and it's a lot easier to multiply a recipe than to divide it.

INGREDIENTS:
1 overripe banana (Side note: Never throw away overripe bananas! Use them for this or to make banana bread, which I'll share here sometime.)
1/4 cup semisweet chocolate chips
1/2 cup quick oats
a tablespoon or two of your favorite chopped nuts---I used macadamia today.
a big spoonful of peanut butter (I haven't tried this, but almond butter might work instead.)

DIRECTIONS:
1. Preheat oven to 350 and grease a good nonstick cookie sheet.
2. Put everything in a medium bowl and mash/whip it up with a fork until it looks well-mixed.

3. Form little cookies with a spoon and bake for 13-15 minutes. Then let them rest on the cookie sheet for at least 5 more minutes before moving them because the "dough" is stickier than normal and needs some time to set.
Enjoy! And stay tuned for some big things next week. I sort of went on a mental vacation this week, but now I've got to get some bigger cooking projects done before school starts.


Friday, August 9, 2013

Another Vegetable You'll Actually Like

      Since even I know that it's no fun just to post a veggie recipe for a whole day, I try to think of strategic ways to throw them in there because they really do deserve some attention. So if you're looking for something sweet, check out the cinnamon muffins I made for breakfast this morning. If, however, you're ready to try something a little different, read on. A week or so ago, I tried a growing trend in healthy eating, kale chips. They're pretty good, but not my favorite, so I decided that I was not yet finished exploring the possibilities of this particular vegetable. I needed to really cook it in a more traditional way before I formed an official opinion of it. So today I sautéed it with garlic, olive oil, and parmesan...a basic, but perfect combination for many vegetables. This recipe is not the kind of thing you have to measure all that precisely, but here's a guideline:

INGREDIENTS:
enough kale to fill a medium frying pan (I use half a big bag of the kind that comes pre-washed and chopped.)
1 teaspoon salt
1 teaspoon pepper
1/2 teaspoon garlic powder
2-3 tablespoons olive oil
1/4 cup grated parmesan

DIRECTIONS:
1. If you don't have pre-packaged kale, make sure to wash it well, cut as much of the stems out as possible, and roughly chop the leaves.
2. Heat 1-2 tablespoons of olive oil over medium heat in a frying pan. Add the kale to the pan, stir it as
best you can for a minute, then drizzle a little bit more olive oil over the top, and sprinkle on the salt, pepper, and garlic powder. This is how voluminous the kale should be when you start:
3. Sauté for 3-4 minutes, then reduce the heat and cover the pan. After about 7 minutes total, the kale should be partially wilted. 
4. Stir it again, the re-cover and continue to cook for 7-8 more minutes. When the kale is completely wilted, turn off the heat and stir in the parmesan.
     One of my little life goals is to try as many different fruits and vegetables as I can. Some of them will be exotic and others, like kale, will be familiar favorites to others but new to me. I'm glad I got to explore it a little and share it. Maybe it's not the most exciting recipe in the world, but it broadens my culinary horizons, and that's always a good thing.


Cinnamon Muffins

     Today I'm going to post two recipes to make up for skipping yesterday. For the first time all summer, I finally cracked a book, and 8 hours later I finished The Hunger Games. So I just didn't get around to cooking anything. Logically, my first recipe of the day is a breakfast treat. You know it's rare for me to post a breakfast recipe, and I'd say it's highly unlikely that I'll ever feel compelled to make cupcakes, but muffins are okay in my book. They're really just a breakfast version of a cupcake, and who doesn't love an excuse to eat dessert and call it breakfast? These cinnamon muffins, like most varieties of muffins, are very easy to make and wonderfully delicious when they're fresh out of the oven.

INGREDIENTS:
1 1/2 cups flour
2/3 cup sugar
1 1/2 teaspoons baking powder
1/2 teaspoon salt
1/4 teaspoon cinnamon
1/4 teaspoon nutmeg
5 tablespoons butter, melted
1/2 cup milk
1 egg

Topping:
2 tablespoons sugar
1/2 teaspoon cinnamon
2 tablespoons butter, melted

DIRECTIONS:
1. Preheat oven to 350. Spray a muffin tin and use cupcake liners. I used a pan for six very large muffins, but feel free to reduce the baking time to make smaller ones.
2. In a large bowl, mix the flour, sugar, baking powder, salt, cinnamon, and nutmeg.
3. Mix in the wet ingredients (butter, milk, and egg.) Stir with a big spoon until just combined, but don't overdo it.
4. Fill the muffin tin using two spoons or a small ice cream scoop if you want to be fancy and smooth the tops out as best you can.
5. Bake at 350 for 25 minutes for this size muffin. Right after you take them out of the oven, carefully flip the pan upside down over a plate to remove them.
6. For the topping, melt 2 more tablespoons of butter in a small bowl. In another bowl, mix the 
cinnamon and sugar. Brush a little bit of butter over the tops of the muffins, then use your hands to sprinkle them with the cinnamon sugar.


     Enjoy! And check back later today for something totally different and totally healthy!

Wednesday, August 7, 2013

Quickie: S'mores in a Croissant

     Since yesterday's recipe was a bit of a project, I thought I'd post something simple today. If you remember my Nutella wonton post, you'll know that I like to come up with strange cultural combinations for some recipes, and today's is another example of that. The other day, I went to Sam's Club and purchased my favorite item in the entire store, a giant box of fresh baked croissants. So when I got home, I had to think of what to do with them, and another stroke of genius hit! Why not make a s'more inside a croissant? I hope I'm not insulting any French people by americanizing one of the greatest baked goods in the world, but essentially, this is just pain au chocolat with marshmallows. So maybe this isn't exactly a recipe so much as an idea, but it was terrific, so I have to share it.

INGREDIENTS:
1 large store bought croissant (Someday I'll learn to make them myself.)
6 squares of a Hershey bar
2 large marshmallows

DIRECTIONS:
1. Cut the croissant in half and arrange the chocolate and marshmallows in between to make a sandwich.
2. To cook this, you have two options:

A. For lazy people like me, microwave for about 30 seconds.
B. To go the extra mile, toast it in a frying pan just like grilled cheese for just a few seconds until the chocolate and marshmallows melt. 
There's no excuse not to try this since it takes literally less than a minute to make. Enjoy, and check out yesterday's German cheesecake if you haven't because it's really great!


Tuesday, August 6, 2013

My Favorite Recipe Ever: German Cheesecake

     If you could only eat one food for the rest of your life, what would it be? I think we've all heard that question and given it at least a minute or two of thought. Today's recipe is my answer. This cheesecake is so uniquely delicious, that I could never get tired of it. Cheesecake as a general category is my favorite food, but this one specifically stands out from the rest. I truly believe that my love for cheesecake has a lot to do with the fact that my great grandfather actually invented the cheesecake, or so the story goes. I never got to meet him, but my grandma has told me this story many times. He was a baker, among other things, and he apparently was the first person to invent the cheesecake, but sold the recipe to a friend at a baking convention. So maybe he could have been as famous as Eli, but it was not meant to be.
     So that's why I love cheesecake, but why do I love this cheesecake? Of course it has to do with my travels in Germany. In Berlin, there's this huge department store called KaDeWe. It has 6 or 7 stories, and the entire top floor is a gourmet grocery store and café. One day, my tour group went there for lunch, and for dessert, I had my first taste of German cheesecake. And guess what, it was awful! First of all, it wasn't even cold, and on top of that, it had a really crumbly texture. Initially, I was really grossed out, but still, there was something else about it that I kind of almost liked. If I ignored the weird texture, the flavor of it was very different and interesting. It's hard to describe, but it's cheesier than American cheesecake. For a long time, I couldn't figure out why, but after a little research, I found my answer: Quark.


     Quark is a distinctly German dairy product that I describe as a cross between cream cheese, sour cream, and yogurt. It's thick, slightly tangy, and technically qualifies as a cheese. But the great thing about it is that it's pretty good for you! People use it in baking, but you can also just eat a bowl of it with fruit for breakfast. Apparently German cheesecakes are all made from this stuff, and that's what makes them so different. So be prepared for that. It's nothing like a New York cheesecake, but it's approximately 62 times better than that. If made properly, a German cheesecake will have the tangy flavor of Quark but will also be smooth and creamy.
     But here's the catch: Quark is ridiculously hard to find in this country. So far, I only know of one company from Vermont that produces it, and I have only been able to find it at Whole Foods. It's rare and it's expensive, so this recipe is a once in a while treat, but that just makes me appreciate it more when I do have it. I know this isn't something that you guys are going to make all the time, but please try it at least once. I'm not exaggerating when I say that it's my favorite food on the planet. Maybe it could be yours too.

INGREDIENTS:
For crust:
1 1/3 cups flour
1/2 stick of cold butter, cubed
1/4 cup sugar
pinch of salt
1 egg

For filling:
3 eggs
3/4 cup sugar
2 teaspoons vanilla
1 stick of butter, softened
1/2 cup of heavy cream or half and half
2lbs Quark
1 1/2 tablespoons cornstarch
pinch of salt

DIRECTIONS:
1. Preheat oven to 325 and grease and flour a 9-inch springform pan.
2. This crust is really easy to make. Prepare it by hand with a pastry cutter or in a food processor. First, mix the dry ingredients together, then cut in the butter until it gets that pebbly pie crust texture. Mix the egg in last.
3. Dump the crust mixture into the pan and press it along the bottom and as far up the sides as you can. The crust should be pretty thick. It'll seem too dry at first, but when it's all done, it'll be absolutely perfect. Unlike a thin graham cracker crust, this should be like cheesecake on top of a shortbread cookie. Bake the crust by itself at 325 for 10 minutes, then let it cool before filling it.
4. Make the filling. Using an electric mixer, beat the eggs, sugar, and vanilla until fluffy. Then, add the softened butter. When that's incorporated, add all of the other filling ingredients and continue to blend until it's completely smooth.

5. Pour the filling into the pan and bake at 325 for 70-90 minutes. I know that seems like a big range, but it depends on so many factors. After 60 to 70 minutes, check the center with a toothpick every 10 minutes. I have made this many times, and each time it takes a different amount of time, but it's usually closer to 90 minutes in my oven. Just keep a close eye on it, and when the toothpick comes out clean, it's done. It will have cracks in it unless you really want to bake it in a water bath, but I just love the homemade look!

6. Now it's time for the hard part: Getting the thing to chill thoroughly within a safe amount of time. Most people would probably tell you to let it sit at room temperature for at least an hour and then refrigerate it. But I've tried that, and I ended up with a cheesecake that was still lukewarm in the middle after 5 hours, and that's just gross. Most people will think this is crazy, but here's my best advice: Let the cheesecake cool at room temperature for just 20-30 minutes until the pan is cool enough that you can take it off and transfer it to a large plate. Then put it straight into the freezer for at least an hour, maybe two. Don't forget about it in there, and transfer it to the fridge after that.
7. Slice it up, and top it with your favorite fruit if you want to. This cheesecake is actually really good just plain, but this time, I sprinkled some pomegranate seeds over the top because you know how I love pomegranates! 
     I'm sorry that this post is so long...wait no, I'm really not. My favorite food deserves all the detail. I really hope that people try this even though it takes a little time and effort. My whole mission in writing this blog is to get people to stop being afraid of baking. I hope I explain things in a way that makes it seem simple because that's why I love cooking. If you can follow directions, you can create something great. So enjoy, and come back tomorrow for more!

Monday, August 5, 2013

Where Life Can Take You

     I have to interrupt today's regularly scheduled programming to take a step back and appreciate life, and how food can be such an enriching part of it. It dawned on me last night, that exactly one year ago to the day, I was on a train going back to Munich after spending a wonderful weekend in Vienna. At the beginning of the summer of 2012, I had no exciting plans, but after making a very spontaneous last-minute decision to visit a friend in Germany that August, I really began to appreciate the fact than life can surprise you sometimes in the best ways. Even a month before I left, if someone had said that I would be running around some of the most beautiful cities in Europe by the end of the summer, I wouldn't have believed them. So you never know where you can end up in a month or a year, and after remembering the first anniversary of my trip to my favorite city in the world so far, I then realized that I have no idea where I'll be a year from now. I could still be in Germany, I could be studying in a summer program, I could be traveling somewhere else in Europe, or I could be sitting right back here in my childhood bedroom. But here's the crazy thing about that: I actually think that's a comforting thought. Although I don't know where I'll be, I do know that it could be someplace really great because that's happened to me before. I'm excited to let life surprise me again.
     So what does all this have to do with food? Well, I connect food and travel in my mind. I often remember places and even people by associating them with the food I had, so I thought I'd share some of my favorite meals from my weekend in Vienna. As I already said in my Wiener Schnitzel post, I unfortunately ran out of time to find actual wierner schnitzel in Vienna, but this lunch I had at the opera house café was pretty good too:

     That's a huge slice of roast beef topped with veggies with a side of Kartoffelpuffer, which I liked so much, I had to learn to make them myself! So yes, I'm that nerdy tourist who takes more pictures of food than actual attractions, but somehow these pictures trigger the most vivid memories for me. After lunch on the same day, we went to a different café for dessert. Everything on the menu at this place looked like a work of art, and after a long deliberation, I decided to try this one:
     This was sort of a jello/pudding creation, and as you can see, it actually looks exactly like the picture on the menu! How often does that happen?
     
     So I hope you enjoyed this very different kind of post. I definitely do want to continue the recipes well into the future, but looking ahead, this is how I envision the travel portion of the blog to be when I'm in Europe. It won't all be centered on food, but food and travel seem to go together quite naturally, so there will probably be more posts like this to come. Tomorrow, I'm finally going to post my all-time, hands-down favorite recipe ever, ever in the whole wide world. So come back to find out what it is!