Showing posts with label Savory. Show all posts

Thursday, June 12, 2014

Sour Cream and Onion Crusted Chicken

     Today's recipe is another super simple dinner idea. In fact, you probably don't even need a recipe to make it.  I think people are always looking for different ways to make chicken, and this is an easy one to add to your repertoire.  We've all heard of potato chip chicken, but this variation is a little more fun.

INGREDIENTS:
4 chicken breasts
about 1 cup of crushed sour cream and onion chips
1/4 cup flour
1 egg

DIRECTIONS:
1. Preheat the oven to 375 and spray a baking dish.
2. Set up your assembly line with the flour in one dish, the beaten egg in the next, and the crushed chips in the last.

3. Lightly coat each piece of chicken in flour, then dip it in the egg, and then completely coat in in potato chip pieces.
4. Bake at 375 for 35-45 minutes.

Enjoy and come back later this week for another dessert!


Sunday, June 8, 2014

Stuffed Bell Peppers

     As I promised in yesterday's post, today I'm sharing a really delicious and simple dinner. You can make stuffed peppers with all kinds of different fillings, but this one is a good baseline recipe. Served with a little extra rice on the side, they make a hearty meal that looks a whole lot fancier than it really is!

INGREDIENTS:
6 bell peppers---Choose ones that can stand upright.
1lb ground beef
1/2 large onion
1 clove of garlic
1 14oz can of diced tomatoes
about 1 1/2 cups of grated pepper jack or Monterrey jack cheese
2 cups brown rice (Save some for serving on the side.)
salt, pepper, and a light sprinkling of cayenne pepper

DIRECTIONS:
1. Preheat oven to 375. Chop garlic and onion. Slice the tops of the peppers about 1/2 inch from the stem, and clean out the seeds. Grate the cheese now too, and start the rice.
2. In a lage pan, brown the beef, then add the onions and cook until clear.
3. Add the garlic, tomatoes, and seasoning and lower the heat.
4. When the rice is done, mix in some of that until most of the tomato juice is absorbed (about half). Last, turn off the heat and stir in about 2/3 of the cheese, leaving enough to cover the tops of the peppers later.
5. Use a tablespoon to fill each pepper all the way to the top. Then cover each with more cheese.

6. Bake at 375 for at least 30 minutes. Serve with remaining rice.


Enjoy, and come back tomorrow for dessert!

Saturday, June 7, 2014

Quickie: Biscuits with Pancetta and Cheese

     It's been a really long time since I've done one of these fast, simple, semi-hommade recipes. It's not really a recipe, just a fun spin on one of everyone's favorite store-bought shortcuts, those delightfully flaky biscuits that come conveniently in a can.  Of course these are a great addition to any dinner just as they are, but they also have endless possibilities and are second only to the canned crescent roll. With a little bit of fancy ham and cheese, you can completely reinvent them.

INGREDIENTS:
1 can of 10 flaky biscuits
10 slices of pancetta (or prosciutto)
10 slices or cubes of pepper jack (or Monterrey jack) cheese

DIRECTIONS:
1. Preheat the oven according to the directions on the can and spray a muffin tin with Pam.
2. Gently flatten each biscuit, place them in the muffin tin, and press the dough up the sides to create a little cup.
3. Wrap a piece of pancetta around a cube of pepper jack cheese (or roll it with a slice of cheese) and tuck it into the middle of each biscuit cup.
4. Bake according to the directions on the can, then carefully take them out of the pan and enjoy.
Come back tomorrow for this entire dinner recipe!

Wednesday, June 4, 2014

Baked Paprika and Parmesan Chips

     Today I learned something very surprising. I learned that baked potato chips don't have to taste like a bad excuse for real ones. I've actually been experimenting with healthy homemade chips for a while. I've made them out of zucchini, eggplant, and kale, all with great results. But for some reason, I just assumed that if I tried making potato chips this way, they would somehow fall short. Since I had only a couple of leftover potatoes, I decided to give it a try anyway, and I know a lot of people say this about baked chips, but I really mean it when I say that you can't tell the difference. Well, I take that back. You can tell a difference, but the homemade ones are better. The key to a good result is getting very thin slices of potato, which I think would be impossible to do without a mandoline slicer. As for the seasoning, I just sort of made it up, and I'm excited to try different flavors in the future.

INGREDIENTS:
2 large potatoes (or just use whatever kind you have already)
1/4 cup olive oil
1/2 teaspoon salt
1/2 teaspoon pepper
1/2 teaspoon paprika
2 tablespoons grated parmesan

DIRECTIONS:
1. Preheat oven to 425 and line baking sheets with parchment or foil.
2. Wash the potatoes, leave the skin on, and carefully slice them on a mandoline slicer.
3. In a small bowl, mix the salt, pepper, paprika, and parmesan into the oil.
4. Lay the potato slices on the baking sheets in a single layer, and brush each side with the oil mixture.
2. Bake at 425 until the chips are browned and crispy. Flip them occasionally. Start with 20 minutes, at which point the smaller slices could be done, and then check the rest at least every five minutes. Because all the slices are different sizes and the ones near the edges of the pan will cook faster, there's no way to have them all done at the same time. The last ones were done after about 40 minutes. Each time you check, take the done ones and let them drain on a paper towel.
One final note, try not to make more chips than you will eat at one time. The tradeoff for having healthier, homemade chips is that there are no preservatives to keep them fresh and crunchy for a long time. But other than that, they're perfect! Enjoy, and come  back tomorrow for another sweet treat!

Friday, May 30, 2014

The Best German Potato Salad

     I'm back! I have been home for two weeks now, and as I expected, I completely crashed for the first one. After transitioning from the very exciting, over-stimulating experience that is life abroad, I knew I wasn't going to want to do a thing for the first few days. Plus it didn't help that I caught a cold immediately after landing. Apparently I'm allergic to America. And reverse culture shock is sort of a thing. I think it gets a little exaggerated, although there is a little Germany-shaped hole in my heart right now. However, I am enjoying all the things that I missed while I was away. And of course I'm having fun sharing all the European things that I could bring back with me with my family, most of which are recipes.
     Yesterday, I rediscovered the joy of spending the better part of my summer days in the kitchen, just like I used to, and I have some really cool things to share. But today, I'll kick it all off with something really simple that reminds me of my second home: Schwäbischer Kartoffelsalat or Swabian potato salad. Now I don't care for the typical American potato salad, mainly because I have issues with our tendency to slather various foods with mayonnaise and call it "salad." When most Americans thing of German potato salad, they expect something similar to the American version, only slathered in mustard instead of mayonnaise. The different regions of Germany are very diverse, and there really is no one type of German potato salad, but I can say that the Swabian kind that I have come to love is not like that at all. No mayonnaise, no mustard, just delicious simplicity.

INGREDIENTS:
None of this really needs to be measured, but here's a guideline for 4-6 servings

4 large potatoes, or more smaller ones
1/2 medium onion, finely chopped, in any variety you like
1/2 cup chicken or vegetable broth
3 tablespoons olive oil
3-4 tablespoons apple cider vinegar
salt and pepper
bacon bits (optional)
chopped chives (optional)

DIRECTIONS:
1. Wash and peel the potatoes. Boil them whole until done (about 20 minutes), but be careful not to overcook them.
2. Drain the potatoes and rinse them in cold water.
3. Once they are safe to touch, use a pairing knife to slice them as thinly as possible.
4. In a medium bowl, gently toss the potato slices with all other ingredients. Taste test and adjust.
5. This is traditionally served hot, but it's good cold too.
     It's so simple, but that's what makes it perfect! Enjoy, and come back tomorrow for something very different and very American!


Tuesday, May 13, 2014

Birthday Post: German Quiche

     No, it's not my birthday. That already happened, but this is even more exciting! Exactly one year ago, this blog was born. On that day, I posted what is still one of my favorite recipes, fresh triple berry pie. Despite the bad newbie photography, I'll always be proud of that post and of the fact that I actually had the guts to start this and then commit to it. I remember how I waited months before even telling my family I was doing this, for fear they wouldn't take it seriously. And I waited even longer to make a Facebook like page because I was afraid no one would "like" it.  I knew that I couldn't compete with the famous food bloggers, and I still can't, but when I started, I decided that as long as 5 people read it, it'd be worth it. Luckily this community has grown bigger than that, and I feel that I'm at least starting to accomplish my greater goal of teaching people not to fear learning to cook.
     And now for the actual recipe portion of this post, the Schwäbischer Zwiebelkuchen. Don't let the name scare you, it's basically quiche Lorraine, which was actually most likely invented by Germans.  Everybody wants to take the credit. Swabia, the region of Germany that I now call home, is really close to France, so there's probably a little cultural overlap in this case. But no matter what you call it, this quiche/cake/pie is extremely delicious. I made one big one just for myself, ate it for literally every meal for 3 days, and didn't get sick of it. In fact, I'll probably make another one soon. (I think we established long ago that I have no shame when it comes to food. And also very little in most other areas of my life.) But anyway, this recipe is good. Really good. I didn't even plan to make it my anniversary post, but it deserves the honor.

INGREDIENTS:
Shortcrust:
1/2 cup sugar
1 3/4 sticks butter, softened
1 egg
pinch of salt
pinch of baking powder
2 1/2 cups flour

2lbs. onions, finely chopped
a slab of bacon, chopped
1 1/2 cups sour cream
4 eggs
2 tablespoons flour
2 teaspoons salt
1 teaspoon pepper

DIRECTIONS:
1. It's best to prepare the crust dough a few hours early, chill it in the fridge, then take it out 30 minutes before use. To make it, beat the butter, sugar, egg, and salt until fluffy. then gradually add the dry ingredients. Mix it with a machine or by hand, but it does need a little bit of hand kneading at the end. It should come together nicely.
2. Preheat the oven to 400 and grease and flour a 12inch springform pan. Chop the onions, then the bacon. Slices of bacon work too, but the raw slab is more German and more like ham, so I prefer that.
3. Fry up the bacon in a pan, then add the onions. Cook them in butter on medium-high heat until they look clear, and then lower the heat and let them caramelize for 30 minutes. Remember there's a fine line between caramelized and burnt. 
4. In a large bowl, make the "batter." Mix together the flor, salt, pepper, eggs, and sour cream until smooth. Then stir in the onions and bacon.
5. Roll out the crust dough and fit it into the pan. Make sure it goes all the way up the sides, but leave the edge unfinished to give it that rustic look.
6. Pour the batter into the crust and bake at 400 for 45 minutes to an hour, until the middle is set. I've decided that my weird German oven is more like a broiler, so that's why I can't give good estimates on baking times anymore. 


     Just because I really want you to make this and love it as much as I do, I'll even condone substituting pre-made pie crust. That way, it's super easy. Have it for whatever meal you want. It's always a good time for quiche.
     And now for my super special announcement: I'm going back to the good old days of daily recipes! I'm not sure yet, when I'll start because I'm leaving Germany for home on Thursday. It would have been perfect to start the daily posts again exactly on the anniversary, but I will need some time to recover from my flight and settle back in at home. That could be two days or two weeks, I don't know. But I will get back into my old rhythm sometime soon. That being said, because I'm one year older and wiser now, I'm a lot more concerned with quality than quantity. I'm not going to force myself to come up with something great every day. Yes, I will cook every day, but they can't all be winners, and I could post mediocre things, but that's not really worth. So if and when that happens, maybe I'll just post some random thoughts on whatever is inspiring me at the time. I don't know if that would interest anyone, but I have been wanting to try it because I have a lot of thoughts, and sometimes I feel like I put myself in a box with the food/travel themes. So we shall see. 
     I want to thank all of my readers for your support and encouragement. Thank you for following me around the world. I really hope that you try some of these recipes and enjoy them as much as I do. Because of you, this year has been a blast. Let's continue to grow this little community. It's gonna be a fun summer, followed by another year of European adventure. I can't wait!

Tuesday, May 6, 2014

The Best Things I Ate: The European Tour

     It's time for the last installment of "The best things I ate."  Check out parts 1 and 2 if you haven't yet. This time, instead of dishes from Germany, I've collected all of my favorite meals from various countries I visited over spring break. Since this post required extensive research, it will be rather long, but I have to share these things because they are such an important part of why I love travel, and they are what inspire me to create new recipes of my own. Whether I'm at home or halfway around the world, I try to branch out and try new things, as well as authentic classics, and here, you'll see a good mix of both, organized by city.

Prague:
This was the first dinner I had in the first city of break, and it was a great way to kick it all off! It was roast pork with horseradish mashed potatoes and a gorgeous gravy. It was classic Czech food with a little added elegance. Another reason to love Prague is that even fancy restaurants are ridiculously cheap because of the exchange rate!


This little treat is something I grew up eating at home. Kolacky are little Bohemian cookies filled with jelly or cream cheese that come in all shapes and sizes. I saw these at a bakery stand at a local festival and just had to have a real one!

Budapest:
For even cheaper fancy food, this is the place for you! This was my birthday dinner, chicken with beetroot risotto. I'm not really a fan of beets, but I am a huge fan of risotto, so I decided to take a risk and order it. And not only does it look beautiful, it tasted perfect too!

Vienna:


A long time ago, I did an entire post about my favorite foods in Vienna, but one thing I regretted missing out on the first time was some real Wiener Schnitzel. So this time, I found a restaurant that was really popular with the locals and finally had some. Some of my friends got the giant version that was bigger than the plate, but I opted for this one to get the sides. That way, it didn't look entirely like a heart attack on a plate. At least there was some lettuce.

Venice:

Unlike Prague and Budapest, food in Venice can get pretty expensive. But one thing that's always a deal is pizza. Honestly, my favorite pizza in the world is still Chicago style deep-dish, but for authenticity's sake, this one was pretty good too. But it was a struggle to eat with a knife and fork.

Rome:
It was here that I first learned how to eat like an Italian. Apparently, the giant bowl of pasta is only the first course, and you're supposed to have room for a meat course after that. I usually just picked one or the other, but this pesto was my favorite pasta course, mostly because I believe you can never have too much basil.

Cinque Terre: 
As a general rule, whenever I'm lucky enough to go to a restaurant where I can see the ocean from my table, I order fish. And that's almost the only time I order fish. This was the first time that I ever got one with the head still attached, but after respectfully laying a piece of lettuce over the face, I thoroughly enjoyed this meal.
     So far, I haven't mentioned any restaurants by name, but I feel compelled to for this next one. Based on rave reviews from Rick Steves and Tripadvisor, I had to try Il Pirata in the tiny town of Vernazza. I'm sure all their food is great, but I specifically wanted to go for breakfast.
First, there's this little cup of wonderful. The owner gave us a little free sample, describing the mix of fresh strawberry slush and whipped cream as "the Italian yoghurt." That little taste was not enough. And just the fact that this is considered just like yoghurt here is just another reason why I love this country.
Finally, yes, I did order a cannoli for breakfast. I had to do it, and it was the best one I've ever had. And now I know better than to order a pre-filled one. These are filled only after you order them so that they stay delightfully fresh and crunchy.

     So that's how I ate my way across Europe. Next week, I'll write my last Reutlingen post as I prepare to go home for the summer. And by the way, this is the 150th post on Spoonful of Zucker. This blog has become exactly what I envisioned, a perfect mix of fabulous food and fabulous places. Thank you all for coming along for the ride this year. I can't wait to see where it will take us in the next one!

Monday, April 28, 2014

Homemade Pizza Dough

    So I haven't been posting much lately, but I have a really good excuse. I've been on a two-and-a-half week odyssey of a spring break backpacking all around Europe, and that meant no computer and limited internet access. But I think it's important to take technology breaks sometimes, especially during vacation, because it allows you to be more present. Within the next few days, I'll be posting multiple reports on my travels, but first, I thought it was time for a recipe. And this one is fitting too, considering that I did just spend a week in Italy. For the longest time, I've wanted to start making my own pizzas, and I finally got around to it. Obviously, the dough is the only slightly tricky part, and I'm sure I can improve in the future, but for a first attempt, this was actually pretty easy and pretty good! Of course you can put whatever you want on top, but I thought I'd start with the classic margherita.

INGREDIENTS:
3/4 cup warm water
1 packet of dry yeast
2 cups all-purpose flour
3/4 teaspoon salt
1 teaspoon sugar
a few tablespoons of olive oil

a jar a pizza sauce
one blob of fresh mozzarella
2 fresh tomatoes
a bunch of fresh basil

DIRECTIONS:
1. The dough only takes an hour. And make it by hand, it's more fun that way! Start by mixing the yeast into the warm water in a big bowl, and let that sit for 5 minutes.
2. Mix the salt and sugar into the flour. Then gradually add that to the yeast bowl. When you have half of the dry ingredients mixed into the dough, add a few tablespoons of olive oil, then add the rest of the flour.
3. Transfer the dough to a floured surface and knead it for a couple minutes. Add flour if it's too sticky to work with. When you have it in a nice, neat ball, grease a clean bowl, and let the dough rise, covered with a towel for an hour.
4. Now punch the dough down, put it back on your floured surface, and roll it out to whatever size and thickness you want.
5. Preheat the oven to 425 while you prepare the toppings.

Spread a layer of pizza sauce on, stopping before you get to the edge, so you can roll it a little and place slices of tomato and cheese. Add the basil last, after it's cooked.
6. The cooking time really depends on the size of your pizza pan and the thickness of your crust. Start with 20 minutes, then just watch it.
Try it out, experiment with toppings, and enjoy!

Sunday, March 23, 2014

Perfectly Simple Risotto

     I've been wanting to make risotto for a long time. I assumed that it was a very complicated process, but I'm glad to report that it's really not. Yes, it does require a little time and your undivided attention, but it's not actually difficult. The only reason it took me two tries to get right was because I got a splitting migraine in the middle of my first attempt and was unable to give it the love and attention it deserved. But this time, it was perfect. It's so good, it makes me not want to eat plain rice now. And while I usually think of my culinary endeavors in Germany as one long ride on the struggle bus, this one really wasn't compromised. Okay, I confess I did use plain rice instead of risotto rice, but hey, it worked.

INGREDIENTS:
1 cup risotto rice
3 cups chicken broth
1 stalk of celery, finely chopped
a handful of button mushrooms, finely chopped
2 shallots, minced
half a stick of butter
1 clove of garlic
1 cup white wine
1/2 cup grated parmesan
salt and pepper to taste

DIRECTIONS:
1. In a saucepan, gently simmer the chicken broth, so that it's warm when you add it to the rice later.
2. Chop the vegetables. Then sauté them in half of the butter for a few minutes until tender.
3. Add the rice to the frying pan and sauté with the veggies for about 2 minutes until it just starts to turn translucent.

4. Now, transfer the rice and veggies to a larger pot, and add the wine. Stir it constantly until the wine is absorbed. Maybe 5 minutes. The constant stirring is the essential part of this process.
5. Once all the wine is absorbed, do the same thing with the broth, 1/2 cup at a time. Add 1/2 cup, stir it  constantly until the liquid absorbs, and repeat until the broth is gone. The whole process should take about 25 minutes. when you're out of liquid, the rice should be cooked.
5. Finally, stir in the other half of the butter and the parmesan until it all melts. Then serve immediately.

See, it's that easy. Just make sure to give it your undivided attention, and you should get the result you want. Enjoy!

Wednesday, March 19, 2014

The Best Things I Ate This Month: Part 2

     As you are probably well aware, one of my favorite things about living in Europe is eating in Europe. Since my last "Best of" food post was so much fun to write (and research) I have, in fact, decided to make it a series. For each of the four months of my travels, I will post the very best things I ate. While the first post was dedicated to German favorites, this one also includes culinary pleasures from Austria and Paris. Since I only spend 36 hours in Paris, there's no way I could possibly do its incredible cuisine justice, but rest assured, I'm going back for more on Thursday. I have many, many things to share this month, so this is going to be mostly pictures (in chronological order) with short commentary.

First, the Thüringer Wurst, my first experience with street food. Surprisingly good for just 1 euro!


Next, there's Spaghetti-Eis. It looks like spaghetti, but it's ice cream. And it's terrific!
I had this meal in a very old Austrian restaurant in Salzburg. It's pork roast with the best gravy and a giant Knödel. That's a dumpling, but I just like the word Knödel.
This was my meal at the Hofbräuhaus in Munich. This establishment isn't exactly known for the food, so the schnitzel cordon bleu was just okay. 

The apple strudel, however, was perfect. Fresh and not too sweet.

On a day trip to Ulm, we stopped at a little café for cake and coffee. This is a slice of blueberry goodness.

And now, on to Paris! The first thing I ate there (besides the free breakfast at the hostel) was a Nutella crêpe. They don't skimp on the Nutella!

While in Paris, we decided to have one splurge dinner at a real brasserie. The steak-frites was great!

And the crème brûlée was even better! That crunch of the sugar on top is the sound of perfection!

     So those were the highlights. Over the next month, I'll continue to be that tourist, taking pictures of all my food, living that food blogger thug life, so I can share it all with you!


Sunday, March 16, 2014

Honey Beer Bread

     When I was a little kid, I was absolutely perplexed by this stuff. I loved it, but I really felt like I shouldn't. "You mean it has beer in it, but I can eat it?" the five-year-old me would ask. It felt wrong. Beer was for old people, and it smelled funny. How could it transform into something so delicious when baked? I didn't get it at the time, but now years later, and living in the land of beer, I had to revisit this old favorite. And I'm so glad I did. With only a few ingredients and about 10 minutes of effort, the result was absolutely heavenly.

INGREDIENTS:
2 cups all purpose flour
1 cup bread flour
1 tablespoon baking powder
1 teaspoon salt
2 tablespoons sugar
3 tablespoons honey
12 ounces of beer
1/2 stick of melted butter

DIRECTIONS:
1. Preheat the oven to 350 and spray a loaf pan (which I didn't have, so my bread is more cake-shaped)
2. In a large bowl, mix all the dry ingredients.
3. Add in the honey and beer and mix just until there are no floury spots left.
4. Transfer the dough to the pan and smooth the top. Pour the melted butter over the top before baking. Bake for about 45 minutes, or until the top is golden brown.
5. Enjoy this while it's fresh, with real butter.
Again, sorry it's cake-shaped. We'll call it rustic.

Monday, March 10, 2014

Lemon Chicken

     Have I told you guys lately that cooking here in Germany is hard? Every recipe involves ingredient substitutions, complicated conversions, and generally lackluster presentation. I feel like every post I write from here should begin with an apology because honestly, if I were at home, it would look better. I promise it all tastes just as good, but aesthetically, it takes some imagination. Even though cooking takes twice as much planning and time here, I'm not going to stop. Eventually, I'll learn what works here and what doesn't, and since I'm staying another year, maybe I can justify expanding my limited array of kitchen gadgets. But this particular recipe was a winner, winner, chicken dinner. It was actually  arelatively easy road to lemony goodness.

INGREDIENTS:
4 servings of chicken---White is good, dark would be better. I wanted to get some with the skin on, but my tiny German grocery store didn't have that today.
5 cloves of garlic, minced
1/4 cup olive oil
1/2 cup white wine
2 lemons, zest both, wedge one, and squeeze the juice of the other one
salt, pepper, thyme, and oregano

DIRECTIONS:
1. Preheat the oven to 400. Chop the garlic, zest and juice the lemons.
2. In the bottom of a glass baking dish, mix the oil, wine, garlic, and lemon juice and zest.
3. Add the chicken to the dish, place lemon wedges in between, season with spices, and brush the top with the olive oil mixture, once before and once or twice during cooking.
4. Bake for 35 to 40 minutes, depending on the size of the pieces.


It's simple and delicious. Enjoy!

Thursday, February 27, 2014

Olive and Prosciutto Spaghetti

     The day I got back from my last 10-day trip, I couldn't wait to cook myself a proper meal. The travel diet is less than ideal, so the whole train ride home, I was planning my dinner. Remembering the beef bourguignon I had recently made, I realized that I still had half a bottle of red wine in the fridge. Since you couldn't pay me enough to drink the stuff, I needed to find another recipe to use it up. As I walked up to my apartment, I had my heart set on making coq au vin. Until I opened the fridge and saw that someone had stolen my leftover wine!

Dear beverage thief,
     I understand that my open bottle of wine had been in the fridge for over a week. I can see how it would seem that it had been forgotten. Still, I assure you that the pleasure I would have gotten out of my delicious dinner would have been much greater than that that you got from drinking it. If the highlight of your day is scoring half a bottle of $3 wine, then I urge you to take a step back and look at your life.
                                                                                                  Sincerely,
                                                                                                  The mad chef.
     So I had to think of a plan b. And what do you think I did instead of slaving for hours over an elaborate French meal? That's right, I made spaghetti! Now, it wasn't just any spaghetti. It was inspired by Pinterest, but simply because this is Germany, it ended up being a new creation. Also because this is Germany, you'll notice a complete lack of attention given to presentation. I really should go buy some bigger pans. Anyway, this recipe has many of my favorite things in it. It takes one of the easiest foods on Earth to cook and classes it up just a notch.

INGREDIENTS:
1/2lb dried spaghetti
2 minced shallots
3 cloves of garlic
3/4 cup black olives
3 diced tomatoes
3/4 cup white wine
3 tablespoons butter
2 tablespoons tomato paste
about 8 slices of prosciutto
1 teaspoon flour
grated parmesan
fresh basil

DIRECTIONS:
1. Cook and drain the spaghetti. Prepare all the veggies.


2. In the pot you used to cook the pasta, heat some olive oil, and cook the shallots for 2 minutes. Add the olives, tomatoes, prosciutto, and garlic, and continue to cook for 2 minutes.

3. Now build the sauce by adding the wine and letting it cook for 2-3 minutes. Then, stir in the butter and tomato paste. When you're almost done, thicken it as much as you need to by adding a little bit of flour.
4. Toss the pasta with the sauce, and serve garnished with parmesan and fresh basil. Unfortunately, parmesan only comes in slices here. It's bizarre. 
Enjoy, and stay tuned for when I finally get around to making that coq au vin. I'm thinking next week!


Tuesday, February 11, 2014

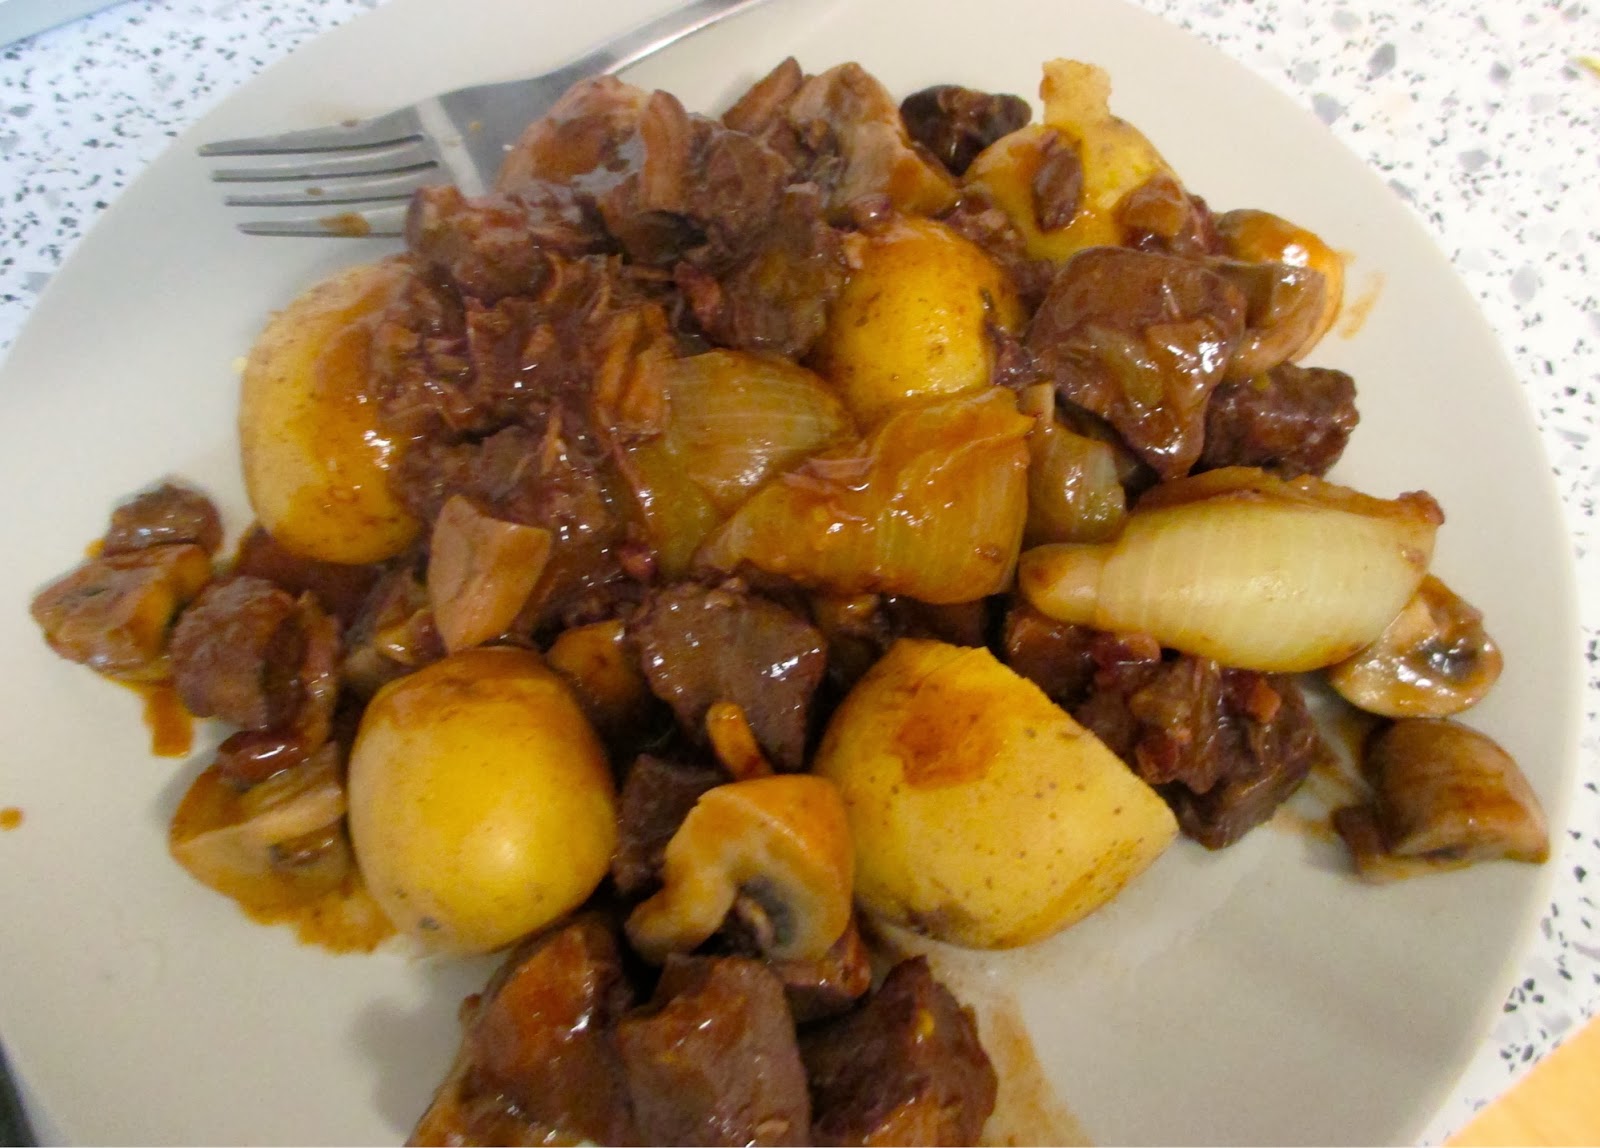
Tuesdays With Julia: Beef Bourguignon

     This is something I've been wanting to make for months, but until now, I haven't had the time. I must be crazy for attempting such a complicated recipe while I'm abroad, with limited ingredients and unfamiliar kitchen equipment, but I'm sure glad I did it. After returning from a week of travel, I wanted to take a day to unwind, and the best place for me to be on a day like that is in the kitchen. Plus, everyone else here was exhausted too. In all the craziness of my study abroad schedule, I haven't had much time to enjoy my hobbies lately, and after a while, that starts to get to me. So on that lazy Saturday morning, I got this romantic idea in my head, of how I could have the most perfect day all by myself, exploring a new culinary adventure.
     The biggest challenge came before the actual cooking part. I spent all morning going to three different grocery stores to find all the ingredients. Shopping here in Germany was an interesting experience to say the least, but after successfully ordering from the butcher in German and buying wine without getting carded, I felt very accomplished. I didn't even find everything on the list, but despite my omissions and substitutions (and my $3.00 bottle of wine) it still turned out perfect. In fact, it was more than perfect. It was on a whole new level. But I can't take all the credit. I know I never could have done it without Julia.

INGREDIENTS: (makes 6 servings)
3lbs beef stew meat
6oz chopped raw bacon
1 chopped onion, plus 20 baby onions
2 tablespoons flour
3 cups red wine
3 cups beef stock
1 tablespoon tomato paste
2 cloves chopped garlic
1lb mushrooms, quartered
1/2 stick butter
small potatoes to serve with
salt, pepper, olive oil

and Julia's herb bouquet that I couldn't find or afford her in Germany: 4 parsley sprigs, one-half bay leaf, one-quarter teaspoon thyme, tied in cheesecloth

DIRECTIONS:
1. Let's start with the bacon. American bacon is basically unheard of in Germany, but I did manage t find this package of raw-looking bacon-like bits:
Sauté the pieces in olive oil for a few minutes to brown, then remove them from the pan.
2. Chop the large onion and the mushrooms and preheat the oven to 450.

3. Heat the butter in the pan. First, brown the vegetables for a few minutes, then stick them in the fridge. You won't need to add them until the beef is done simmering. Next, brown the meat on all sides.
4. Transfer the beef to a shallow, oven-safe dish. Season it with salt and pepper, and toss it with the flour. Let it brown in the 450 degree oven for 4 minutes, then stir/flip and brown for another 4 minutes.
5. Put the meat into a big pot and add in the bacon, garlic, broth, and wine. Here's where I can't follow Julia exactly. She says to bring it all to a simmer on the stove, then cover it and let it simmer in a 325 degree oven for 3-4 hours. Since my study abroad program generously provided me with some pretty good pots and pans but not an ovenproof casserole, I had to do the whole thing on the stove instead, which also worked out fine.
6. While the beef is simmering, prepare the small onions. In a saucepan, sauté them in olive oil for 10 minutes. Then add another 1/2 cup of broth and the herb bouquet, cover, and simmer for 45 minutes.
7. If you wish to serve this over potatoes, boil them while you're waiting for the onions.
8. After the meat has simmered to the desired tenderness, add the mushrooms and onions to the big pot, briefly bring it all back up to a boil, then serve.

     For dessert, I also threw together a loose interpretation of Julia's tart aux pommes with some leftover apples I had. I took way too many liberties with this to make a separate post for it, namely, that it's more of a galette than a tarte because I also don't have a tarte pan. Still, it turned out pretty good.
So the moral of the story here is to never be afraid of recipes that sound fancy and French. The greater the challenge, the greater the reward!