Friday, May 31, 2013

Cookie Dough Ice Cream

     Who doesn't love cookie dough ice cream? It brings out the little kid in all of us. I used to feel silly ordering it instead of a more grown-up flavor, but later I just decided to have no shame. So what if my favorite ice cream flavor is the same as that of most five-year-olds? I can't be the only one. Since I like an unusually high cookie dough to actual ice cream ratio, I made much more dough than you actually need and used the extra to bake a batch of cookies. Also, the base is regular vanilla ice cream, so if that's all you want, feel free to skip the cookie dough. (But why would you want to do that???)

INGREDIENTS:

For dough:
1 cup flour
1/2 teaspoon baking soda
1/2 teaspoon salt
1 stick of butter, softened
1/3 cup brown sugar
1/2 teaspoon vanilla
1 egg (You have to use pasteurized for this.)
1 cup mini chocolate chips

For ice cream:
1 cup whole milk
1 1/2 cups heavy cream
4 egg yolks
2 teaspoons vanilla
1/2 cup sugar
pinch of salt

DIRECTIONS:
1. In a large bowl, mix up all ingredients for the cookie dough. Start with a spoon, but get your hands in there at some point. The order doesn't matter much as long as you add the chocolate chips last. Refrigerate dough until ice cream is done.
2. In a medium pot, mix the egg yolks, sugar, salt, and milk. Heat on low for 5 minutes until it just starts to boil. Stir constantly.
3. Run this mixture through a sieve, then return it to the pot. Add the cream and vanilla and heat on low for another 3-5 minutes.
4. Refrigerate the ice cream for 2 hours. While you're waiting, divide the cookie dough into thirds. Take 2/3 of it and bake regular cookies. (350 for 11-14 minutes)
5. Take the other 1/3 of the dough and form little bite sized pieces out of it. For my ice cream maker, they recommend that I let it mix the ice cream alone for 15 minutes and then add any solid mix-ins for the last 15 minutes.

6. Run the ice cream in your machine and add the cookie dough at the recommended time. Then transfer to a sealed plastic container and freeze for 4 hours before serving. Makes about 1 quart.
I hope you enjoy this little trip back to your youth! Tomorrow I'll post more dinner ideas.

Thursday, May 30, 2013

Creamy Tomato Gazpacho

     Over Christmas, my mom and I went on a Caribbean cruise. It was fun, but honestly, I think my favorite part was the food--specifically all the different flavors of gazpacho. They had classic tomato and even more dessert-like flavors like mango, cranberry, and blueberry. Sometimes it was like drinking a milkshake and calling it dinner. I have never been a huge fan of most flavors of hot soup, and I think that's because I'm one of those people who always feels too warm. Especially in the summer, cold soup is really refreshing. I have a theory that Panera could make a killing selling gazpacho in the summer, but while I'm waiting for them to catch on, I'll just make it myself. So just as I've been doing with ice cream, I'm going to start inventing different flavors of gazpacho. Today I'll start with tomato. This recipe makes about 8 servings.

INGREDIENTS:
5 tomatoes
1 small cucumber
2 cloves of garlic
1 red bell pepper
1 green onion
a few leaves of fresh basil
1 1/2 cups crushed ice
1 1/4 cups orange juice
2 tablespoons sugar
6oz plain Greek yogurt
salt and pepper

DIRECTIONS:
1. Clean and chop the tomatoes, cucumber, garlic, red pepper, green onion, and basil. Peel the cucumber, but the other skins can stay on.


2. Puree all the non-tomato veggies in a blender or food processor first.

3. Remove that puree from the blender and puree the tomatoes. Then add the yogurt and blend more.
4. Combine the two purees in a large pitcher. Then work in batches to blend it all one more time until it is very smooth. Add a little bit of the already-crused ice to each batch before the final blend. When you finish blending one batch, transfer it to another clean pitcher.
5. Now add the sugar, orange juice, salt, and pepper to the pitcher and stir well with a spoon. This is the time to taste-test and adjust since everyone's veggies can have different degrees of sweetness. Refrigerate and shake well before serving. 
I know you all must be in shock right now that I actually made a completely healthy recipe. Don't worry, tomorrow I'm making cookie dough ice cream!

Wednesday, May 29, 2013

Chocolate Soufflé

     Soufflé is one of those dishes that everyone automatically assumes is difficult. This was the first time I made it, and even I was a little nervous. However, it was actually much easier than I had expected and it turned out perfect. It's fluffy and light, but rich at the same time and tastes like culinary heaven. It takes about 45 minutes to prepare, and if you follow a few simple rules, you'll get a great result. This recipe fills two 8oz short oven-proof coffee mugs (or ramekins if you want to be really authentic.) Note: In the pictures, you'll see I adjusted the recipe to make 3 portions, but the ingredient list is for 2.

INGREDIENTS:
3 tablespoons of butter
2 teaspoons cocoa powder
1/3 cup semisweet chocolate chips
1/2 teaspoon vanilla
2 eggs, separated
2 tablespoons sugar
pinch of salt
1/2 teaspoon fresh lemon juice

DIRECTIONS:
1. Preheat oven to 375. Take 1 tablespoon of butter and use it to grease your ramekins or mugs. Then put 1 teaspoon of cocoa powder into each and turn it around until the bottom and sides get coated. It's just like greasing and flouring a cake pan, only with cocoa.
2. Melt the chocolate chips with the other 2 tablespoons of butter in a double boiler (a glass bowl on top of a pot of boiling water.) While you're waiting for that to melt, take the eggs out of the fridge and let them come to room temperature. I set them along the side of the hot stove to speed up that process.
3. When the chocolate and butter are completely melted, take the bowl off the heat and whisk in the vanilla.
4. Grab another small bowl and carefully separate the eggs. Let the whites fall into the small bowl, then drop the yolks into the bowl of chocolate. I have no idea why, but it's very important that you whisk the yolks into the chocolate one at a time, so separate one egg, whisk in the yolk completely, then do the other egg. This is just one of the secrets of soufflé.
    Now it's time to whip the egg whites. This can be complicated, but if you follow a few hints, you'll have no problem. Fist, I highly recommend using a stand mixer with the round whisk attachment. It's possible to do it with a hand mixer or just by hand, but that can be a real pain in the neck. Second, use a very clean, very cold metal bowl. Put it in the fridge or even the freezer for a few minutes before you use it. Third, make sure your egg whites really are at room temperature and that there is absolutely no little bit of yolk left in them. Finally, adding the little bit of lemon juice really helps the whipping process.
5. So transfer the egg whites into your pre-chilled bowl and add the sugar, salt, and lemon juice. Beat in the mixer on the highest setting until it looks like whipped cream (about 5 minutes, maybe more).
6. Now add the egg whites to the bowl of chocolate and fold them in very gently using a rubber spatula. The second secret to soufflé is to not over-mix the egg whites, or else they'll lose their fluffiness. Fold only until the color is pretty consistent, but under-mixing is better than over-mixing.

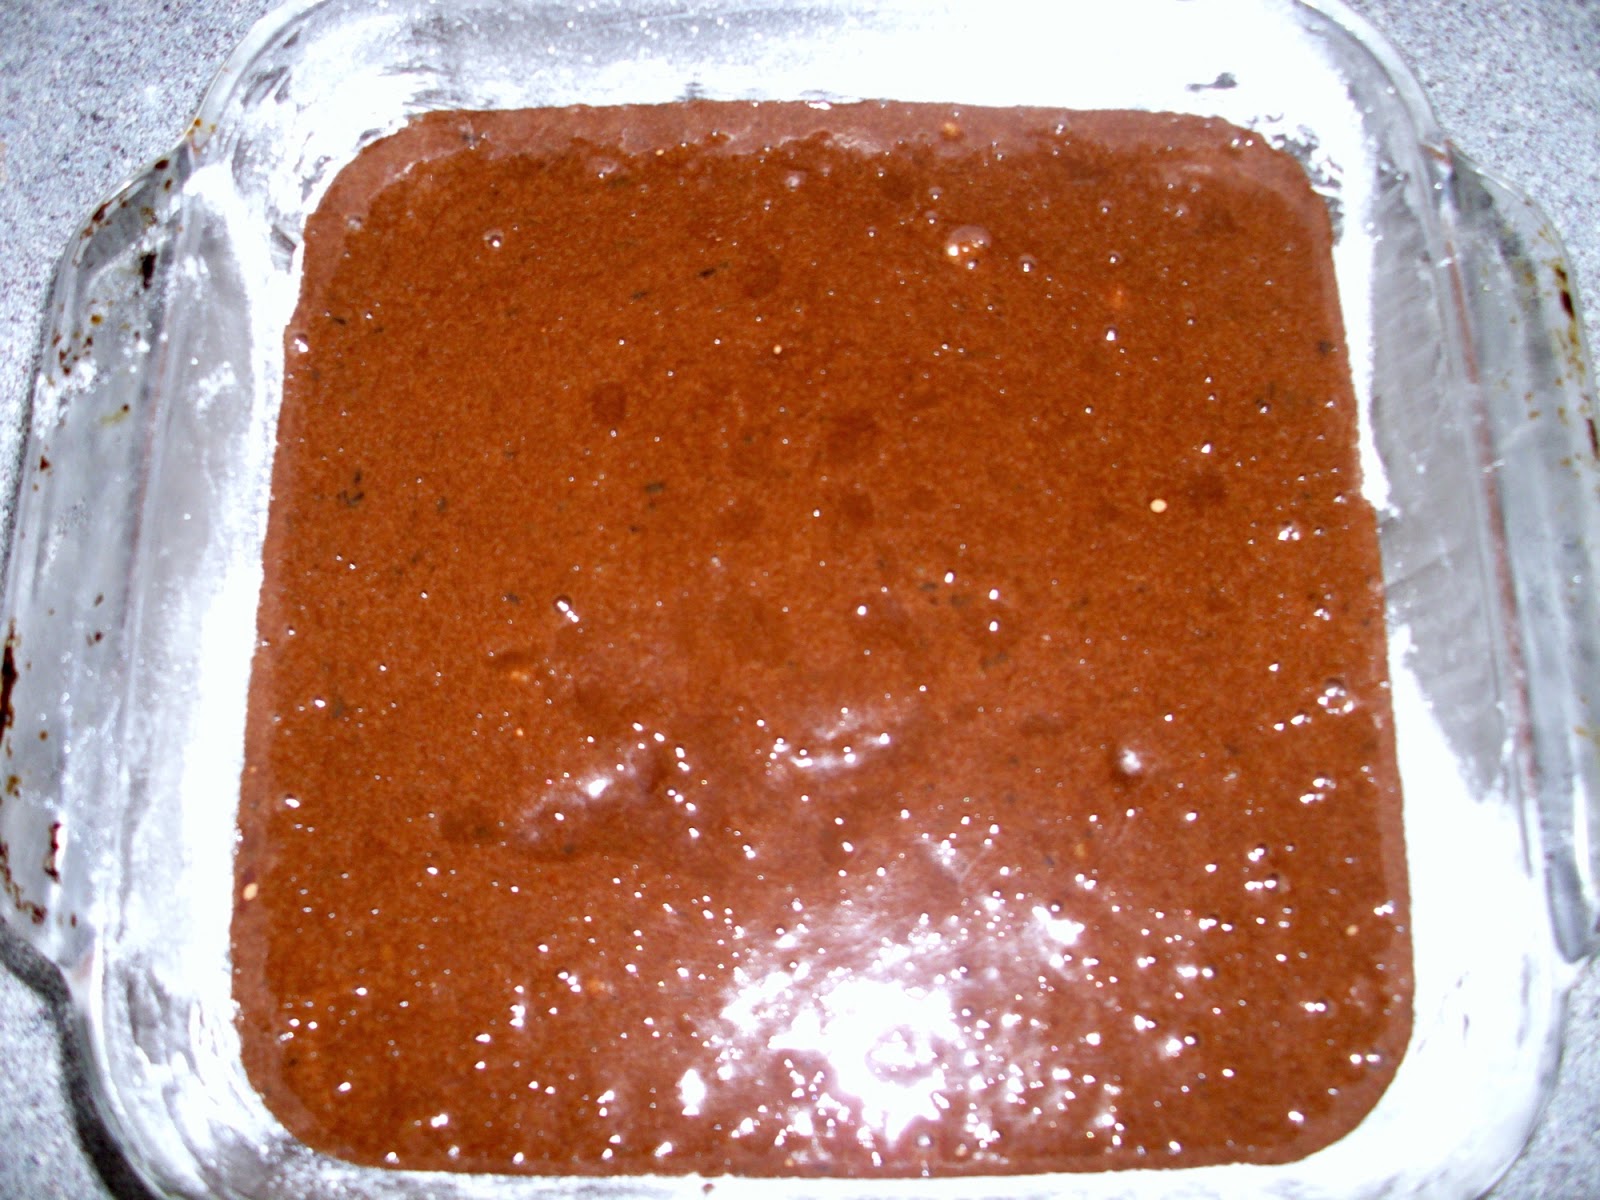
7. Finally, spoon the batter into the individual cups and bake for 20 minutes until the tops puff up. You can cover the cups and refrigerate them until you're ready to bake them, just add 5 minutes to the baking time. Either way, the third and final secret to soufflé is to serve them immediately after baking (like within a minute or two) because the tops will start to sink. My suggestion is to prepare the batter ahead of time, refrigerate it, then put it in the oven before you sit down for dinner. Then it'll be ready when you are.


This soufflé was the highlight of my day and week! Maybe it can be yours too! Enjoy, and come back tomorrow for another one of my favorite things.


Tuesday, May 28, 2013

Soupe à l'oignon (French Onion Soup)

          German is my first linguistic love, and although French and I hame a more complicated relationship, I like to think I speak that too. I secretly wish that German cuisine was as exciting as French cuisine, and although it does have some real gems, the French usually win in this comparison. For dinner tonight, I made one of the easiest but best French foods, soupe à l'oignon. This recipe makes 4 servings as a main dish, more if you're serving it as an appetizer.

INGREDIENTS:
4 medium onions (or 2 large ones) (or 1 giant one like I used)
2 tablespoons olive oil
2 cloves of garlic
2 tablespoons flour
1/2 teaspoon dried thyme
1 bay leaf
5 cups beef broth
1 cup white wine
salt and pepper
a sliced baguette
butter
about 2 cups of shredded mozzarella (If you want to go the extra mile, use Swiss or Gruyère instead.)

DIRECTIONS:
1. Preheat oven to 400 and make sure your soup bowls are oven-safe.
2. Slice the onions and chop the garlic.
3. In a large pot, cook the onions down in the olive oil on medium to high heat for 20 minutes, stirring occasionally.
4. Add the flour and garlic and cook for 3 more minutes.
5. Add the broth, wine, and all dry spices. Bring to a boil, then reduce heat, cover, and simmer for 20 minutes.

6. While you're waiting for the soup to cook, slice and butter the bread. Toast it in the oven or toaster oven.
7. Divide the soup into individual bowls, float a slice of bread in each and top with mozzarella. 

8. Bake on a cookie sheet for 10-15 minutes. Enjoy, but be careful, it'll be extremely hot!
Bon appetit! Don't forget to come back tomorrow for the mouthwatering French dessert I made to go with this: chocolate soufflé!

Monday, May 27, 2013

Plum Pie

     For some reason, I've begun to think of Monday as pie day. Sometimes this is because a yummy slice of pie turns any day into a good day, but with today being Memorial Day, it seems fitting to have an all-American dessert. I know plum isn't the most popular pie flavor, but it's actually my second favorite, so I encourage you to give it a chance. This recipe is very similar to my triple berry pie recipe (my first favorite) that I posted a couple of weeks ago. I use the same crumble topping, and again, I'm going to take a shortcut and use pre-made crust.

INGREDIENTS:
Filling:
8 plums
1 box refrigerated pie crust
1/2 cup brown sugar
1/4 cup cornstarch
2 tablespoons flour
1 teaspoon cinnamon

Topping:
2/3 cup flour
2/3 cup whole oats
2/3 cup brown sugar
2/3 cup chopped walnuts
1 stick of very cold butter

DIRECTIONS:
1. Spray a 9 inch glass pie plate and fit the crust in the bottom. Preheat the oven to 350.
2. Wash and cut the plums into thin wedges. You don't need to peel them because the skin is very thin. If they are very ripe, skip to step 4.
3. If the plums are not very ripe yet, that's ok. Just put them in a pot and heat them on the stove for a few minutes until they darken and soften ever so slightly.
4. In a small bowl, mix the cornstarch, flour, cinnamon, and brown sugar.
5. In a large bowl, toss the plum wedges with this dry mixture. Then add this to the pie plate.
6. (shameless cut and paste) For the topping, you need to combine all of the dry ingredients with the butter until the texture looks like small peas. To do this, you have three options: a) Pulse the mixture in a food processor. b) Use a pastry cutter to do it by hand. (My favorite method) or c) use two butter knives.  Whatever you do, don't just use your hands because then the butter will melt and the texture won't be right.  It should look like this: 
7. Cover the pie with this crumble, using all of it. Then bake for 1 hour, cool on the counter for 1 hour, and refrigerate 2 additional hours before serving. Store in the fridge.

Tomorrow's recipe: French onion soup!


Sunday, May 26, 2013

Quickie: Italian Scrambled Eggs

     Sometimes it's really worth taking an extra ten minutes to start your day off right with a hot breakfast. Sure, you could toast a pop tart or pour a bowl of cereal in less time, but a couple of scrambled eggs don't require much more effort. Usually, I scramble them up and just add a little cheddar, but yesterday I decided to mix it up a bit. I noticed that I had three little magical ingredients that were made for each other: tomatoes, mozzarella, and fresh basil. On a side note, I could put fresh basil on anything. It smells heavenly and is great to have on hand. one of these days I'm going to buy a basil plant and start growing my own. Anyway, I decided to be adventurous and add these lovely Italian flavors to my eggs.

INGREDIENTS:
2 eggs
a handful of cherry tomatoes, cut in half
a handful of shredded mozzarella cheese
about 3 leaves of fresh basil, torn into little pieces
salt and pepper

DIRECTIONS:
Okay, I know most of you don't really need instructions for making scrambled eggs, at least I hope not. Just melt a little butter in your pan, pour in the eggs, add salt and pepper, and when they're pretty much done, add all the goodies.


Enjoy! We'll get back to the sweet stuff tomorrow!

Saturday, May 25, 2013

Basic Beef Stroganoff

     This is comfort food for me. It's not healthy at all, but its meaty, creamy goodness tastes like home. You can make some healthier substitutions, such as using low fat sour cream and low sodium broth. Also, I know this doesn't exactly belong in stroganoff, but I like to add frozen peas because I can't stand it when there's nothing green on a plate. Of course if you're one of those people who hate mushrooms, you can leave them out. This recipe makes 6 servings, but in the pictures, you'll see I cut it in half for my family.

INGREDIENTS:
1 1/2 lbs. sirloin steak, chopped into bite-sized pieces
8 oz fresh sliced mushrooms
1 chopped onion
1 chopped clove of garlic
1/2 stick of butter
1 1/2 cups beef broth
1 1/2 teaspoons Worcestershire sauce (very important secret ingredient)
1/4 cup flour
1 1/2 cups sour cream
6 servings of egg noodles
1/2 bag of frozen peas (optional)

DIRECTIONS:
1. Start boiling the noodles.
2. Slice the mushrooms and chop the onion and garlic. Cook them in the butter over medium heat until the onions are clear.

3. Take the veggies out of the pan. Cut the meat into small pieces, and brown it in the same pan.
4. Add the broth and Worcestershire sauce. Heat until it boils, then reduce the heat, cover it, and simmer it for 10 minutes.
5. Add the flour to the pan and stir well.
6. Add the onions, mushrooms, and peas and boil for 2-3 minutes.

7. Stir in the sour cream and heat it through, but don't let it boil at this point.


Serve in large bowls over the egg noodles and enjoy! Check back tomorrow for a quick and delicious Sunday breakfast!

Friday, May 24, 2013

Pesto Mac & Cheese

     This is one of my purely accidental creations that I somehow threw together when I was at school and thought there was no food in the house. Surprisingly, it turned out really good, and I proved to myself once again that college food doesn't have to be awful. It's only 6 ingredients, but it seems like fancy food. Maybe I just think of pesto as a really fancy sauce compared to many others, and someday I want to make my own from scratch. But today, we'll keep it simple and use the kind from a jar. I used medium shell pasta, but bow ties or macaroni would work too. Also, I used some mini babybel white cheddar cheese because that's all I had, but that's probably not the most economical option. You may want to buy a block of cheese and shred it yourself.

INGREDIENTS:
4 servings of medium shell pasta
12oz jar of pesto sauce (But you can use as much or as little as you like.)
8oz of shredded white cheddar cheese
1/2 red onion
1 clove garlic
bread crumbs to top your pan

DIRECTIONS:
1. Start boiling your pasta. Preheat the oven to 375 and spray a glass 8x8 baking dish.
2. Chop the onion and garlic. In a small frying pan, cook them for just a few minutes in a little bit of butter or oil.
3. Drain your pasta, put it back in the pot, and add as much pesto as you like.
4. Now add your garlic, onion, and cheese. Heat on low until it melts.
5. Transfer the pasta to your baking dish and top it with bread crumbs.
6. Bake for 30 minutes. Enjoy!
I haven't decided yet what I want to post tomorrow, so come back for a surprise!

Thursday, May 23, 2013

Prosciutto Wrapped Asparagus

     For the life of me, I cannot figure out why people love bacon so much and feel the need to include it in every meal of the day.  I've never had a bacon burger, I skip the bacon bits on my baked potatoes, and I try to avoid meat at breakfast time whenever possible. However, prosciutto, bacon's Italian cousin is a different story. I don't exactly know what makes it different from bacon, but it's some good stuff. I take full advantage of any and all opportunities to cook with it.  Serving prosciutto with vegetables works really well because the healthiness of the veggies balances out the salt and fat, at least in my world.
     And now my thoughts about asparagus: It's one of my favorite vegetables, and I think many people share this opinion. For one of my college German classes, we had to meet weekly in groups to spend an hour chatting with native speakers. These meetings were always extremely awkward, as we never had any idea what to talk about. One day, we started talking about recipes, and that's when I learned the German word for asparagus: Spargel. We then proceeded to have a 20 minute conversation about Spargel--how to cook it, where it's grown, etc. There are many ways to cook it, but my favorite is roasting it in the oven, wrapped in prosciutto.

INGREDIENTS:
1 bunch of fresh asparagus (about 25 stalks)
at least 5 slices of prosciutto
1/2 teaspoon pepper
juice of 1/2 lemon

DIRECTIONS:
1. Preheat oven to 375 and spray a cookie sheet with Pam.
2. Wash the asparagus and chop the bottom ends off.
3. Squeeze the lemon juice sprinkle the pepper over the stalks. You don't need to add salt because the prosciutto is already salty enough.
4. Divide the asparagus into bunches of 5 stalks. Wrap one slice of prosciutto around the middle of each bunch. Be gentle because the slices are very thin and delicate.

5. Bake at 375 for about 20 minutes or until tender.
I hope this opens up your mind a little to the possibilities of vegetables. Check back tomorrow for another dinner recipe!

Wednesday, May 22, 2013

Mango Ice Cream

     Last week, I was really excited to share my blackberry ice cream recipe, but that was before I tried mango.  Don't get me wrong, the blackberry is still delicious, but this mango flavor is my new favorite thing. Unfortunately, a lot of Americans are unfamiliar with mangos, but they're actually the most consumed fruit worldwide. Ironically, I fell in love with mango ice cream when I was in Germany! This ice cream is like eating a tropical island, which come to think of it may or may not sound that appealing, depending on how literal you want to be. But it's good, trust me. The method to make this is almost the same as my other ice cream recipe and does still require an ice cream maker.

INGREDIENTS:
3 ripe mangos
2/3 cup sugar, divided
1/2 cup whole milk
1 cup heavy cream
2 egg yolks (pasteurized recommended)
juice and zest of 1 lime
1/2 teaspoon vanilla
tiny pinch of cinnamon
4 drops red food coloring (optional)

DIRECTIONS:
1. Peel and chop the mangos into cubes. Look out for the large seed in the center.
2. In a small pot, boil the mangos with the 1/3 cup sugar for 5 minutes until it dissolves.

3. Puree the mango in a blender.
4. In a medium pot, mix the egg yolks, milk, and other 1/3 cup sugar. Heat on low for 5 minutes, or until it just starts to boil. Stir constantly, so the eggs don't cook.

5. Strain this custard to remove any accidental scrambled eggs.
6. Return the custard to the pot and add the cream, vanilla, cinnamon, food coloring, and lime juice and zest.  Continue to heat on low and stir for 3-5 minutes.
7. Chill the mixture in the fridge for 2 hours.
8. Run it in your ice cream maker according to the manufacturer's instructions. Then freeze it in a sealed container for at least 4 more hours before serving.


Enjoy! And come back tomorrow to learn how to make vegetables more fun!


Tuesday, May 21, 2013

Two Breaded Chicken Recipes

     One thing that everyone should have in their kitchen at all times is frozen chicken breast. You can defrost them in the microwave in ten minutes and turn them into hundreds of delicious meals. I'm posting these two recipes together because they're very similar even though the flavors are totally different. Of course you can use fresh chicken instead of frozen, but honestly, I sometimes like using the frozen kind better because they're usually smaller and cook faster. First, we'll make parmesan crusted chicken:

INGREDIENTS:
4 boneless chicken breasts
1 clove chopped garlic
2 tablespoons olive oil
1/2 cup breadcrumbs
1/3 cup grated parmesan cheese
1 teaspoon dried basil
1/4 teaspoon pepper

DIRECTIONS:
1. Preheat oven to 375 and spray a glass baking dish.
2. In a small bowl, mix the garlic into the olive oil.
3. In another small bowl, mix all of the dry ingredients.
4. One at a time, dip each piece of chicken in the oil, then in the breadcrumb mixture, coating both sides.
5. Bake at 375 for 35 minutes.

Now for something a little more tropical, we'll make coconut crusted chicken. The method is exactly the same. Just mix the wet ingredients in one bowl and the dry in another. Dip the chicken in both and bake.

INGREDIENTS:
4 boneless chicken breasts
1/2 cup shredded coconut
1/2 cup breadcrumbs
1/4 cup grated parmesan
2 eggs
1 tablespoon of honey
juice and zest of two limes (Mix the juice in with the eggs and honey and the zest in with the dry mixture.)
Both of these are really simple and really yummy, so try one out the next time you don't know what to have for dinner. Tomorrow's recipe: more ice cream!


Monday, May 20, 2013

Blueberry Chocolate Cake

     For some reason, most people assume it's really difficult to bake a cake from scratch.  The truth is it's really not, and boxed cake mix is mostly just flour, cocoa powder, and sugar packaged up all pretty.  It probably takes less than 10 extra minutes to mix that stuff up yourself. So here's one of my favorite chocolate cake recipes. The blueberries add a little hint of fruitiness but are not overpowering.

INGREDIENTS:
1 cup flour
1 cup sugar
5 tablespoons cocoa powder
3/4 teaspoon baking powder
1/2 teaspoon baking soda
pinch of salt
3/4 cup water
1 cup fresh blueberries
1 egg
1/4 cup heavy cream
1/2 cup semisweet chocolate chips

DIRECTIONS:
1. Mix flour, sugar, cocoa, baking powder, baking soda, and salt in a large bowl.
2. In a blender, puree 1/2 cup of blueberries with the water and the egg.
3. Mix this puree into the bowl of dry ingredients and beat with a whisk until smooth.
4. Pour batter into a greased and floured 8x8 glass dish and bake at 350 for 35 minutes.
5. Remove cake from oven and flip the pan upside down onto a cooling rack. Cool completely before frosting.
6. For frosting, melt the chocolate chips in a double boiler (a glass bowl over a small pot of boiling water). Then stir in the cream and continue to heat until smooth.

7. Let the frosting cool for about 10 minutes, then spread it onto the cake. Use the back of a spoon to create a smooth layer.
8. Sprinkle the other half of the blueberries over the top. It's best to try when it's still a little warm, but be sure to store it in the fridge after that because of the cream in the frosting.


This is one of my very favorite desserts, and I hope it becomes on of yours too! Check back tomorrow for two breaded chicken recipes. 

Sunday, May 19, 2013

Balsamic and Basil Strawberries

     When I was in Germany, one of the things I really loved was the fresh produce, especially the sweetest, tiniest strawberries I had ever had. They must be organic. I had come to the conclusion that European strawberries were just inherently better than American ones, which are usually ridiculously large and sour.  However, on a recent trip to my local farmer's market, I realized that we have organic strawberries here too. My day was instantly made! Variations of this recipe are traditionally made with tomatoes, but strawberries work surprisingly well too.  You can have these on toast as an appetizer or even as a dessert with some fresh whipped cream.

INGREDIENTS:
1/2 pint of strawberries, the littler the sweeter
about 6 leaves of fresh basil
2 tablespoons balsamic vinegar
mozzarella cheese (I used shredded, but fresh would be even better.)
either a baguette or other crusty bread (I used a regular sized loaf and cut the slices in half.)

DIRECTIONS:
1. Preheat oven to 375.
2. Put the bread slices on a cookie sheet, and put the mozzarella on top. Bake for 10-15 minutes until cheese melts.
3. Wash and slice the strawberries.
4. Chop the basil leaves (or just tear them into little pieces. Put them in a bowl with the berries and drizzle the balsamic over the top. Gently mix this.
5. Plop a spoonful of berries onto each piece of cheesy toast and enjoy!
Tomorrow's recipe: Blueberry chocolate cake!