Thursday, June 26, 2014

2 for 1: Sunken Soufflé Cake and the Best Brownies Ever

     Soufflé is one of my favorite things. Even though making it the right way isn't as hard as most people expect, sometimes the fact that it leaves little room for error can be frustrating. Hoping that it doesn't sink before you serve it can be nerve wracking. But what if we didn't have to worry about it sinking? What if that was actually the point? When soufflé sinks, it gets dense and chewy in the best way, taking on a similar consistency to a flourless chocolate cake. Plus, it's really hard to mess it up. So after some thought, I made this cake one way, which turned out great, and as I was eating it, it dawned on me. What other popular dessert is dense, chewy, and chocolaty? That's right, with a few tweaks, this recipe could turn into the best brownies in the world.
     Now because I always like to add a twist to things, I included a secret ingredient. Everyone knows about my unconditional love of basil. I'll use it in pretty much anything. I've used it in a few desserts before, but never with chocolate, and just out of curiosity, I wanted to know if it would work. I really loved the sublet little hint of freshness that it added, but I honestly don't know what others would think. So then I got another interesting idea. For a more familiar flavor, switch out the basil for fresh mint. In fact, mint would probably be better if you're making this into brownies. Of you could just skip the herbs and make it pure chocolate.

INGREDIENTS: (makes a 9-inch round cake or 8x8 square batch of brownies)
1 1/2 cups semisweet chocolate chips
1 1/2 sticks of butter, cut into cubes
3/4 cup sugar
Optional: 1/2 cup fresh basil or mint (use mint for brownies)
1/4 cup flour
pinch of salt
1 1/2 teaspoons vanilla
5 eggs, separated and at room temperature

For ganache:
1/4 cup heavy cream
1/2 cup semisweet chocolate chips

DIRECTIONS:
1. Preheat oven to 350 and grease and flour a 9 inch springform pan or 8x8 square one.
2. If you're choosing to use basil or mint, it needs to be infused with the sugar. You can do this by chopping it and then rubbing it into the sugar for a few minutes by hand, or preferably by pulsing it in a food processor. Then, cover it and let it sit for 1 hour. If you did it by hand, you'll then need to sift out the large pieces of the leaves before continuing. The food processor version looks like this and smells wonderful!

3. Melt the chocolate chips with the butter in the microwave or over a double boiler. Let cool slightly, then whisk in the vanilla, salt, sugar, egg yolks, and finally the flour.
4. In a chilled metal bowl, whip the egg whites on high until the form stiff peaks (firmer than the constancy of whipped cream).
5. Use a rubber spatula to gently fold the egg whites into the chocolate batter. It's okay if it doesn't look completely smooth, just don't overwork it.

6. Bake at 350 for 35-40 minutes. Try to avoid opening the oven in the first 30 minutes. First, the cake will fluff up, and within minutes after removing it from the oven, it'll start to sink. Let it cool for 10 minutes in the pan, then run a knife along the sides, and invert it onto a serving plate. The edges may get crumbly as it sinks, so treat it gently. Chill the cake (or brownies) in the fridge before frosting, so it gets really dense.

7. To make the ganache, melt the chocolate chips wight he heavy cream in a small saucepan over low heat, stirring constantly. Let it cool until it thickens just enough to spread with a spoon. Then pour/spread it on the cake and store it in the fridge. It's actually even better a day later.


Enjoy! This one's really a favorite!

Tuesday, June 17, 2014

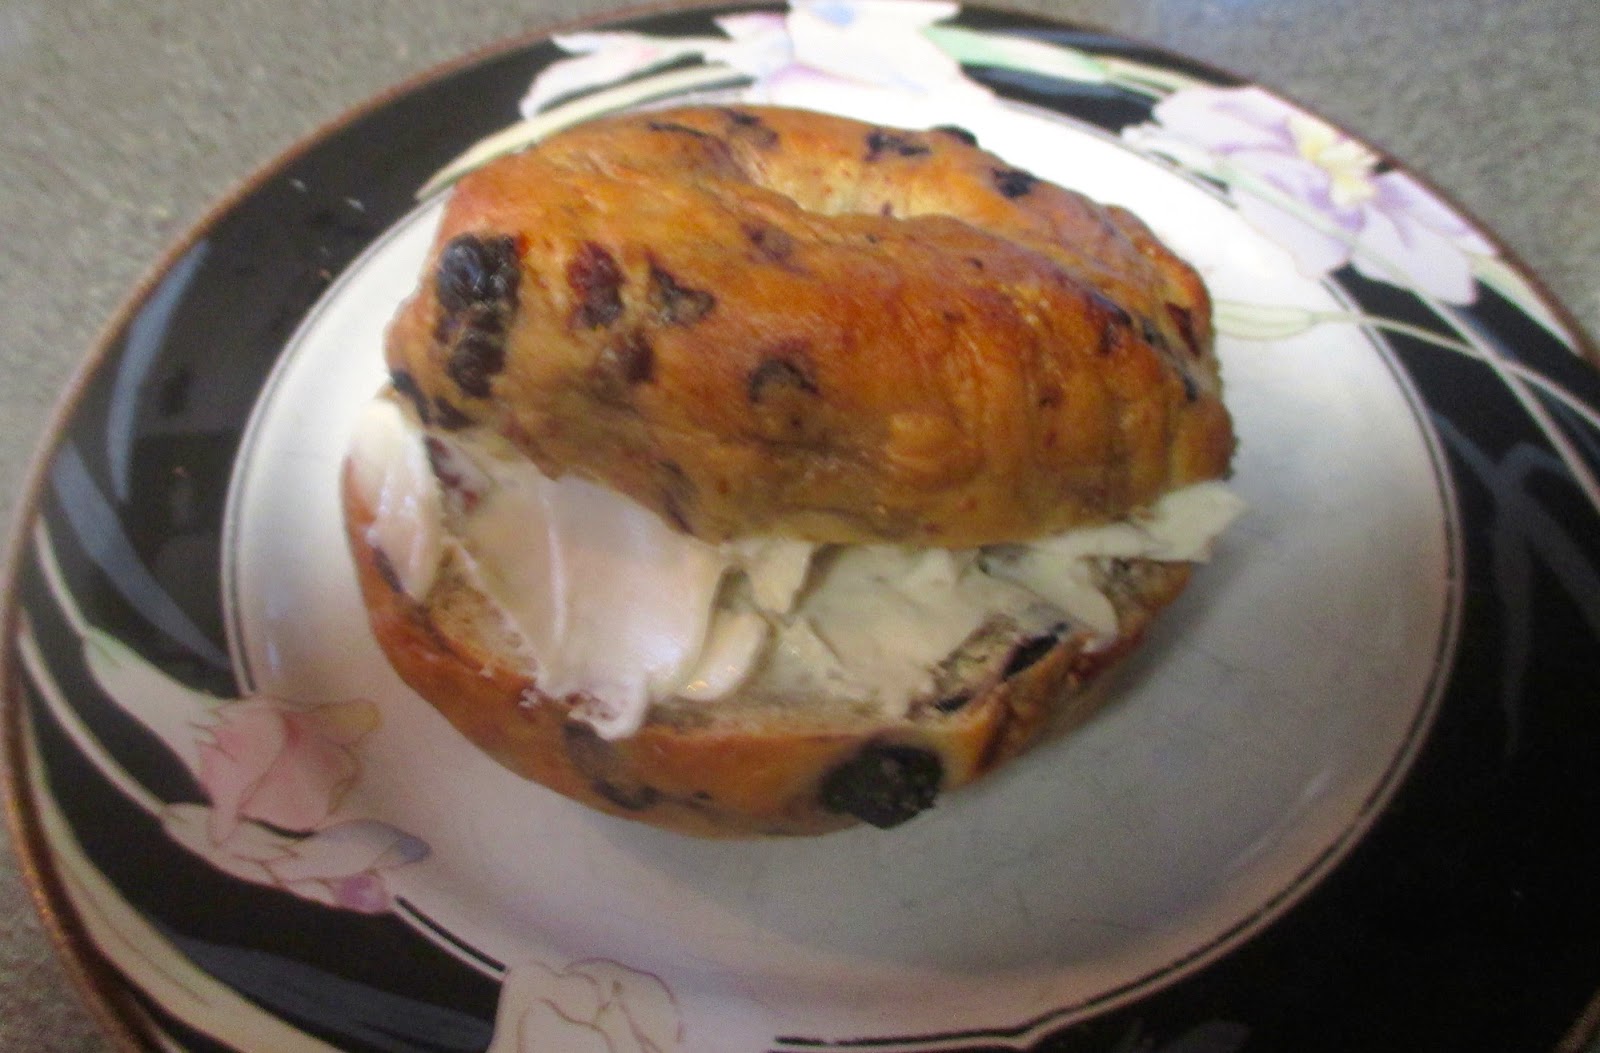
Blueberry and Tart Cherry Bagels

     It's time for another bagel recipe. I just love making them because I really want people to know that it's absolutely worth it to make your own. Once you learn the basic recipe and method, it's very easy to invent a bunch of new flavors. You can even make them in bulk, freeze them, and save a lot of money on breakfasts.  But although I've made hundreds of bagels before, these were a little different. This is the first time I've used fresh fruit in them, and with the added moisture, I didn't know exactly what to expect. I half expected my kitchen to turn purple from exploded blueberries. Luckily, I thought of a way to prevent this. Start with fresh blueberries, but freeze them an hour or two before use. Also, these require a little more flour than usual. The dough will still eventually turn a pretty shade of lavender. Some breakage is inevitable, but pre-freeing buys you a little extra work time before that starts to happen. And because I never make a bagel variety that I could easily find at a Dunkin Donuts, I threw in some dried tart cherries just for fun. They add an extra fruity pop, but of course you can just make classic blueberry if you want. Also, this was the first time I made bagels with an electric mixer in a long time. Both ways are completely doable, but I forgot how easy the machine makes it, especially with the blueberries.

INGREDIENTS: (makes 8 bagels)
1 packet quick-rise yeast
1 tablespoon + 1 teaspoon sugar
1 1/2 teaspoons salt
1 1/2 cups warm water
3 1/2 - 4 cups bread flour
1 cup fresh blueberries, frozen for 1-2 hours (Don't just buy frozen blueberries.)
1/3 cup dried tart cherries

DIRECTIONS:
1. Make the dough in a mixer or by hand. Stir warm water into the yeast and sugar and let sit for 5 minutes.
2. Add salt and flour, 1/2 cup at a time. Stop after adding 3 1/2 cups of flour. Save the rest for later.
3. Knead the dough until everything is well combined. Now, knead in the cherries and blueberries. Here is where the machine will be your best friend. This should requite 6-8 minutes of kneading.
4. After adding the blueberries, the dough will be stickier than bagel dough usually is. To compensate, gradually add more bread flour until the consistency is normal. If this is your first bagel recipe, that should be about another 1/2 cup, bringing the total amount of bread flour to 4 cups.
5. Knead the dough into a big ball, place it in a new, greased bowl, cover with a towel, and let rise for an hour.
6. Transfer the risen dough to a floured surface and gently press it into a slightly flattened circle. Cut it into 8 wedges.

7. To form the bagels, roll each wedge into a ball, push your thumb through the middle of it, and stretch/twirl it until the hole is 1/3 of the diameter.
8. Cover the formed bagels and let them rise for another 30 minutes. During that time, boil a large pot of water, and preheat the oven to 425.
9. After the second rise, boil the bagels for one minute per side. Don't worry, they will float.
10. Finally, bake the bagels on a lightly greased baking sheet at 425 for about 20 minutes.
They're best to eat fresh, so freeze any that won't be eaten within 24 hours. To revive them, microwave them on defrost for one minute, slice, then toast on low.
Enjoy, and look out for new posts throughout the week!

Molten Lava Cake

      This decadent dessert was one of my childhood favorites. I remember several chain restaurants that had versions of it, and how I would purposely not finish my dinner in order to save room for it later.  My younger self was fascinated and perplexed by how exactly they got the lava inside the cake. I thought it was magic. Now it's almost funny to know how simple it really can be. You just don't bake it all the way. There are other ways to do it, but this is definitely the simplest. This recipe only makes two servings because I made it for just my dad and I as a Father's Day present.

INGREDIENTS:
2 tablespoons butter
1/3 cup brown sugar
1/4 cup semisweet chocolate chips
1 egg + 1 egg yolk
a pinch of salt
3 tablespoons flour
powdered sugar for dusting

DIRECTIONS:
1. Preheat oven to 400 and grease 2 individual ramekins (or oven-safe mugs).
2. Melt the butter and chocolate chips in the microwave, then cool slightly.
3. In a medium bowl, beat the eggs with the brown sugar and salt. Next, mix in the butter and chocolate. Finally, add in the flour.

4. Fill the ramekins and bake them. You can adjust the baking time according to just how molten you want them to be. When done, a toothpick halfway to the center should come out clean, but the middle should still be runny. Start with at least 15 minutes, then just cook them to your liking.
5. Dust with powdered sugar on top and enjoy!


Come back tomorrow for the next installment in one of my favorite series!


Friday, June 13, 2014

Chocolate Brownie Pear Tart

      This recipe happened by accident, but sometimes the best ones do. One day I asked my dad to get peaches at the store just to snack on. Well, he came back with pears. I don't usually like to eat fresh pears because they generally seem like a less cool version of apples, but as I discovered with this delicious cheesecake, pears are actually pretty good when transformed into a dessert. The cheesecake is still my favorite, but this chocolaty creation is great too. It has a lot going on--a cookie crust, fruit, and a gooey brownie-like filling, but somehow it works really well.

INGREDIENTS: (for a 9inch tart pan)
Crust:
1 1/3 cup flour
2 tablespoons sugar
2 tablespoons ground almonds
1/2 teaspoon salt
1 stick of cold butter, cubed
4 tablespoons cold water

Filling:
2 pears, peeled and sliced
1/2 cup sugar
3 tablespoons flour
6 tablespoons butter
3 tablespoons semisweet chocolate chips
1 teaspoon vanilla

DIRECTIONS:
1. Preheat oven to 350 and grease and flour the tart pan.
2. Make the crust in a food processor or by hand. Cut the cold butter into the dry ingredients until you get a pebbly consistency. It should stick together when you pinch it, but it will seem rather dry. Add the water in last.
3. Pour the loose crust mixture into the tart pan and form the crust by pressing it along the bottom and up the sides. No rolling needed for this one. Bake the crust by itself at 350 for 10 minutes.
4. Prepare the pear slices and place them in an even layer over the baked crust.
5. You can make the filling either on the stove or in the microwave. Melt the butter with the chocolate chips, let it cool, then beat in the sugar, flour, vanilla, and egg.
6. Pour the filling evenly over the pears.
7. Bake at 350 for about 30-35 minutes or until the top is set. The middle will stay gooey because of the fruit. Chill and serve.
It's like a pie and a brownie, but it has fruit in it so it's good for you. Right?

Thursday, June 12, 2014

Sour Cream and Onion Crusted Chicken

     Today's recipe is another super simple dinner idea. In fact, you probably don't even need a recipe to make it.  I think people are always looking for different ways to make chicken, and this is an easy one to add to your repertoire.  We've all heard of potato chip chicken, but this variation is a little more fun.

INGREDIENTS:
4 chicken breasts
about 1 cup of crushed sour cream and onion chips
1/4 cup flour
1 egg

DIRECTIONS:
1. Preheat the oven to 375 and spray a baking dish.
2. Set up your assembly line with the flour in one dish, the beaten egg in the next, and the crushed chips in the last.

3. Lightly coat each piece of chicken in flour, then dip it in the egg, and then completely coat in in potato chip pieces.
4. Bake at 375 for 35-45 minutes.

Enjoy and come back later this week for another dessert!


Sunday, June 8, 2014

Stuffed Bell Peppers

     As I promised in yesterday's post, today I'm sharing a really delicious and simple dinner. You can make stuffed peppers with all kinds of different fillings, but this one is a good baseline recipe. Served with a little extra rice on the side, they make a hearty meal that looks a whole lot fancier than it really is!

INGREDIENTS:
6 bell peppers---Choose ones that can stand upright.
1lb ground beef
1/2 large onion
1 clove of garlic
1 14oz can of diced tomatoes
about 1 1/2 cups of grated pepper jack or Monterrey jack cheese
2 cups brown rice (Save some for serving on the side.)
salt, pepper, and a light sprinkling of cayenne pepper

DIRECTIONS:
1. Preheat oven to 375. Chop garlic and onion. Slice the tops of the peppers about 1/2 inch from the stem, and clean out the seeds. Grate the cheese now too, and start the rice.
2. In a lage pan, brown the beef, then add the onions and cook until clear.
3. Add the garlic, tomatoes, and seasoning and lower the heat.
4. When the rice is done, mix in some of that until most of the tomato juice is absorbed (about half). Last, turn off the heat and stir in about 2/3 of the cheese, leaving enough to cover the tops of the peppers later.
5. Use a tablespoon to fill each pepper all the way to the top. Then cover each with more cheese.

6. Bake at 375 for at least 30 minutes. Serve with remaining rice.


Enjoy, and come back tomorrow for dessert!

Saturday, June 7, 2014

Quickie: Biscuits with Pancetta and Cheese

     It's been a really long time since I've done one of these fast, simple, semi-hommade recipes. It's not really a recipe, just a fun spin on one of everyone's favorite store-bought shortcuts, those delightfully flaky biscuits that come conveniently in a can.  Of course these are a great addition to any dinner just as they are, but they also have endless possibilities and are second only to the canned crescent roll. With a little bit of fancy ham and cheese, you can completely reinvent them.

INGREDIENTS:
1 can of 10 flaky biscuits
10 slices of pancetta (or prosciutto)
10 slices or cubes of pepper jack (or Monterrey jack) cheese

DIRECTIONS:
1. Preheat the oven according to the directions on the can and spray a muffin tin with Pam.
2. Gently flatten each biscuit, place them in the muffin tin, and press the dough up the sides to create a little cup.
3. Wrap a piece of pancetta around a cube of pepper jack cheese (or roll it with a slice of cheese) and tuck it into the middle of each biscuit cup.
4. Bake according to the directions on the can, then carefully take them out of the pan and enjoy.
Come back tomorrow for this entire dinner recipe!

Friday, June 6, 2014

Brookies

     I'm really excited today because I finally found a recipe for chewy chocolate chip cookies that I actually like! But I didn't stop there. I asked myself what could be better than a warm chewy chocolate chip cookie and the clear answer was a warm chewy chocolate chip cookie attached to a warm chewy brownie, also known as the brookie. It's a double whammy of American dessert classics. I think each of the two doughs that make up the brookies would be great on its own too. In fact, the chocolate chip portion will be my new go-to.

INGREDIENTS: (makes 18 brookies, plus a couple extra chocolate chips)

Brownie dough:
2/3 cup flour
1/4 teaspoon baking powder
1/4 teaspoon salt
3 tablespoons butter
2 tablespoons semisweet chocolate chips
1/2 cup sugar
1 egg
1/2 teaspoon vanilla

Chocolate chip dough:
1/3 cup sugar
1/3 cup brown sugar
5 tablespoons butter, softened
1/2 teaspoon vanilla
1 egg
1 cup flour
1/2 teaspoon baking soda
1/4 teaspoon salt
3/4 cup semisweet chocolate chips

DIRECTIONS:
1. Spray or line cookie sheets and preheat oven to 350.
2. Make the brownie dough first. Mix the dry ingredients in a medium bowl. Then, melt the butter with the chocolate chips in the microwave. Let that cool, then stir in the egg and vanilla. Finally, stir in the dry ingredients. Set aside.
3. Now make the chocolate chip dough. In one bowl, mix the flour, baking soda, and salt. In another bowl, beat the butter with both sugars until fluffy.  Next, add the vanilla and egg to the butter and sugar.   Gradually stir in the flour mixture. Finally, fold in the chocolate chips.
4. Before assembling the brookies, it may help to chill both doughs in the fridge for a few minutes. Start with the brownie dough, and use a small scoop or a spoon to form little dough balls. Place them on a cookie sheet with plenty of room.
5. After you use all the brownie batter, clean the scoop, and do the same thing with the chocolate chip dough. Place these dough balls right next to the brownie ones, making sure they are the same size, even if you have dough left over.

5. Gently push/pinch the two doughs together, and then roll each cookie in your hands to make sure the  two halves are stuck.

6. Bake at 350 for 10 to 12 minutes.

Enjoy these with a cold glass of milk, and come back tomorrow for a creative dinner idea!

Wednesday, June 4, 2014

Baked Paprika and Parmesan Chips

     Today I learned something very surprising. I learned that baked potato chips don't have to taste like a bad excuse for real ones. I've actually been experimenting with healthy homemade chips for a while. I've made them out of zucchini, eggplant, and kale, all with great results. But for some reason, I just assumed that if I tried making potato chips this way, they would somehow fall short. Since I had only a couple of leftover potatoes, I decided to give it a try anyway, and I know a lot of people say this about baked chips, but I really mean it when I say that you can't tell the difference. Well, I take that back. You can tell a difference, but the homemade ones are better. The key to a good result is getting very thin slices of potato, which I think would be impossible to do without a mandoline slicer. As for the seasoning, I just sort of made it up, and I'm excited to try different flavors in the future.

INGREDIENTS:
2 large potatoes (or just use whatever kind you have already)
1/4 cup olive oil
1/2 teaspoon salt
1/2 teaspoon pepper
1/2 teaspoon paprika
2 tablespoons grated parmesan

DIRECTIONS:
1. Preheat oven to 425 and line baking sheets with parchment or foil.
2. Wash the potatoes, leave the skin on, and carefully slice them on a mandoline slicer.
3. In a small bowl, mix the salt, pepper, paprika, and parmesan into the oil.
4. Lay the potato slices on the baking sheets in a single layer, and brush each side with the oil mixture.
2. Bake at 425 until the chips are browned and crispy. Flip them occasionally. Start with 20 minutes, at which point the smaller slices could be done, and then check the rest at least every five minutes. Because all the slices are different sizes and the ones near the edges of the pan will cook faster, there's no way to have them all done at the same time. The last ones were done after about 40 minutes. Each time you check, take the done ones and let them drain on a paper towel.
One final note, try not to make more chips than you will eat at one time. The tradeoff for having healthier, homemade chips is that there are no preservatives to keep them fresh and crunchy for a long time. But other than that, they're perfect! Enjoy, and come  back tomorrow for another sweet treat!

Tuesday, June 3, 2014

Buttermilk Waffles with Peach Sauce

     Today, It's time for one of my very rare breakfast posts. This is something I didn't really plan out, but just made because I didn't know what else to do with the buttermilk left over from this cupcake recipe. Plus, I sometimes feel like I need to post some more basic recipes, as much for my own future reference as for yours. Now, this will be my go-to waffle recipe (because I'm just not a pancake kind of girl.) I like the thin kind because I've grown up with the same thin, heart-shaped waffle maker my whole life. Thick or thin, this recipe should make about 4 servings. Also, I'm not a huge fan of using large amounts of maple syrup (I know, I'm weird) so I decided to make a quick fruit topping. In all honesty, I used nectarines instead of peaches because that's what I had, but they worked just fine. Since I also had some leftover bacon from the recipe above, I then transferred my peach sauce to another bowl and fried the bacon in the leftover sweetness in the same pan.

INGREDIENTS:
Waffles:
1 3/4 cup flour
2 teaspoons baking powder
1 teaspoon baking soda
1/2 teaspoon salt
2 tablespoons sugar
1 3/4 cup buttermilk
2 eggs
2 teaspoons vanilla
1 stick of butter, melted
about 1/2 cup of milk

Peach sauce:
4 peaches, peeled and diced
4 tablespoons brown sugar
2 tablespoons butter
6-8 teaspoons brandy (optional)

DIRECTIONS:
1. Make the sauce first because once you start cooking the waffles, it's hard to multitask. Chop the peaches, cook them over medium heat in the 2 tablespoons of butter. Add the brown sugar and brandy, and let it boil for a few minutes until the consistency gets thick and syrupy.
2. In a medium bowl, whisk together all the dry ingredients for the waffle batter. In another bowl, whisk together only the eggs, vanilla, melted butter, and buttermilk.
3. Mix the wet ingredients into the dry. At this point, it won't be runny enough yet, so add about 1/2 cup of regular milk, until it gets to a manageable consistency. I just like to do this adjustment step last because it allows for more control.
4. Cook the waffles in your waffle iron, top them with the sauce, and enjoy!
Make these this weekend! And come back soon for more recipe ideas!

Sunday, June 1, 2014

Lemon and Basil Sherbet

     I think it's a safe assumption that ice cream is one of many people's favorite parts of summer. Going out and buying it is great, but if you're feeling particularly adventurous, getting an ice cream maker can give you endless freedom to invent flavors that you can't find anywhere else, like mango or blackberry. I understand that the majority of my readers don't have ice cream makers at home or may think it's pointless to get one, but for me, in the summer, it's very necessary, and it's like my favorite toy. Making a batch is an all day project, but depending on the recipe, it can be really simple. I used to love the really rich egg and cream based varieties, and while I still do, this year, I want to challenge myself to come up with some healthier versions. I've tried recipes with nondairy milk bases, and they were ok, but texturally not the best. Eventually, I want to get to the point where sorbet is enough for me, but for now, I'm trying sherbet as a stepping stone to that. Lemon sherbet is a classic. It's light, refreshing, and everybody likes it. But add a little hint of basil, and it's perfection. Initially, I was concerned that some people wouldn't get this combination because maybe not everyone shares my love of basil, but after tasting the finished product, I'm convinced that it will be a hit. The basil flavor is very mild. It's just a hint, but it's the perfect complement. It just tastes like summer.

INGREDIENTS:
about 1 cup of loosely packed fresh basil
1 cup sugar
3 large lemons (1/2 cup of juice and zest of 2)
2 3/4 cup whole milk


DIRECTIONS:
1. Tear the basil leaves, and in a medium bowl, rub them with the sugar for about 5 minutes to really infuse their flavor.
2. Squeeze 1/2 cup of lemon juice, stir it into the bowl, cover it, and let it sit out for an hour. This recipe takes even more time than most ice creams just because the basil needs time to marinate with all the ingredients.


3. Now stir the milk into the lemon juice. Grab another bowl, and run it through a fine strainer to remove the basil leaves and any stray lemon seeds. You will have to work it through the strainer with a spoon and be patient until all of the milk runs through. Finally, stir in the lemon zest, and chill in the fridge for at least 3 hours.

4. After the first chill, run the mixture in an ice cream maker according to the manufacturer's directions (about 20 minutes). Then transfer it to an airtight container and freeze for at least 3-4 hours before serving.
Enjoy, and be sure to check this page regularly for the insane amount of new recipes I'll be posting this summer!