Thursday, June 26, 2014

2 for 1: Sunken Soufflé Cake and the Best Brownies Ever

     Soufflé is one of my favorite things. Even though making it the right way isn't as hard as most people expect, sometimes the fact that it leaves little room for error can be frustrating. Hoping that it doesn't sink before you serve it can be nerve wracking. But what if we didn't have to worry about it sinking? What if that was actually the point? When soufflé sinks, it gets dense and chewy in the best way, taking on a similar consistency to a flourless chocolate cake. Plus, it's really hard to mess it up. So after some thought, I made this cake one way, which turned out great, and as I was eating it, it dawned on me. What other popular dessert is dense, chewy, and chocolaty? That's right, with a few tweaks, this recipe could turn into the best brownies in the world.
     Now because I always like to add a twist to things, I included a secret ingredient. Everyone knows about my unconditional love of basil. I'll use it in pretty much anything. I've used it in a few desserts before, but never with chocolate, and just out of curiosity, I wanted to know if it would work. I really loved the sublet little hint of freshness that it added, but I honestly don't know what others would think. So then I got another interesting idea. For a more familiar flavor, switch out the basil for fresh mint. In fact, mint would probably be better if you're making this into brownies. Of you could just skip the herbs and make it pure chocolate.

INGREDIENTS: (makes a 9-inch round cake or 8x8 square batch of brownies)
1 1/2 cups semisweet chocolate chips
1 1/2 sticks of butter, cut into cubes
3/4 cup sugar
Optional: 1/2 cup fresh basil or mint (use mint for brownies)
1/4 cup flour
pinch of salt
1 1/2 teaspoons vanilla
5 eggs, separated and at room temperature

For ganache:
1/4 cup heavy cream
1/2 cup semisweet chocolate chips

DIRECTIONS:
1. Preheat oven to 350 and grease and flour a 9 inch springform pan or 8x8 square one.
2. If you're choosing to use basil or mint, it needs to be infused with the sugar. You can do this by chopping it and then rubbing it into the sugar for a few minutes by hand, or preferably by pulsing it in a food processor. Then, cover it and let it sit for 1 hour. If you did it by hand, you'll then need to sift out the large pieces of the leaves before continuing. The food processor version looks like this and smells wonderful!

3. Melt the chocolate chips with the butter in the microwave or over a double boiler. Let cool slightly, then whisk in the vanilla, salt, sugar, egg yolks, and finally the flour.
4. In a chilled metal bowl, whip the egg whites on high until the form stiff peaks (firmer than the constancy of whipped cream).
5. Use a rubber spatula to gently fold the egg whites into the chocolate batter. It's okay if it doesn't look completely smooth, just don't overwork it.

6. Bake at 350 for 35-40 minutes. Try to avoid opening the oven in the first 30 minutes. First, the cake will fluff up, and within minutes after removing it from the oven, it'll start to sink. Let it cool for 10 minutes in the pan, then run a knife along the sides, and invert it onto a serving plate. The edges may get crumbly as it sinks, so treat it gently. Chill the cake (or brownies) in the fridge before frosting, so it gets really dense.

7. To make the ganache, melt the chocolate chips wight he heavy cream in a small saucepan over low heat, stirring constantly. Let it cool until it thickens just enough to spread with a spoon. Then pour/spread it on the cake and store it in the fridge. It's actually even better a day later.


Enjoy! This one's really a favorite!

Tuesday, June 17, 2014

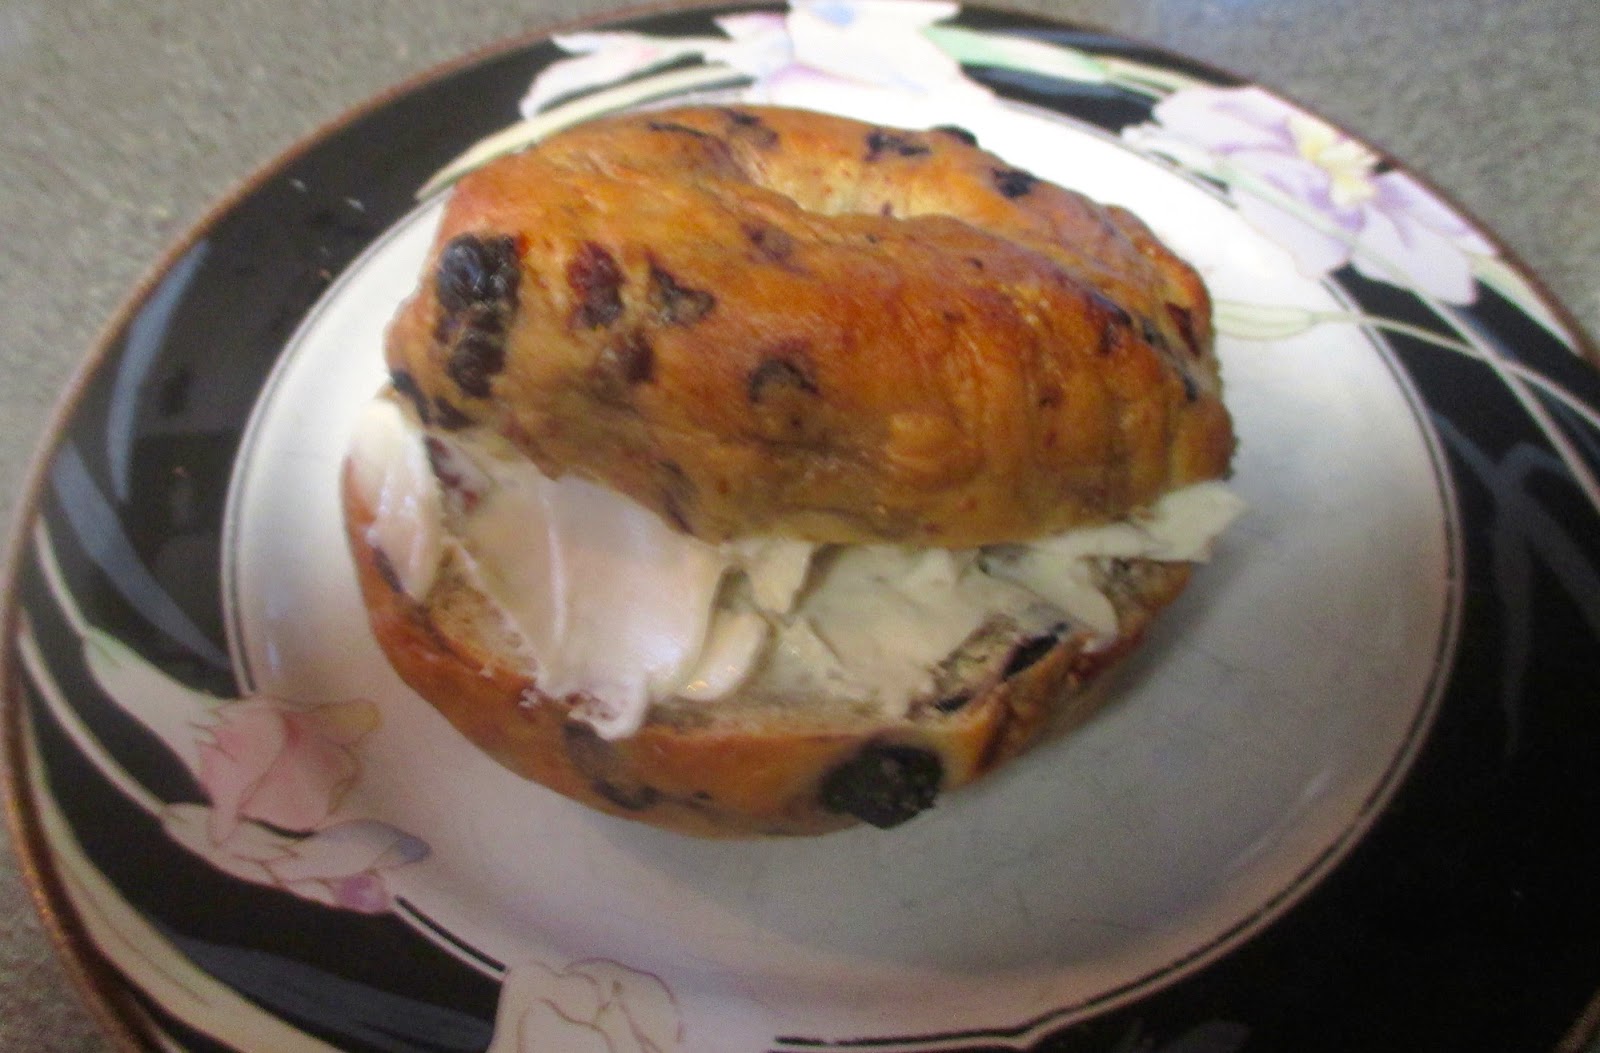
Blueberry and Tart Cherry Bagels

     It's time for another bagel recipe. I just love making them because I really want people to know that it's absolutely worth it to make your own. Once you learn the basic recipe and method, it's very easy to invent a bunch of new flavors. You can even make them in bulk, freeze them, and save a lot of money on breakfasts.  But although I've made hundreds of bagels before, these were a little different. This is the first time I've used fresh fruit in them, and with the added moisture, I didn't know exactly what to expect. I half expected my kitchen to turn purple from exploded blueberries. Luckily, I thought of a way to prevent this. Start with fresh blueberries, but freeze them an hour or two before use. Also, these require a little more flour than usual. The dough will still eventually turn a pretty shade of lavender. Some breakage is inevitable, but pre-freeing buys you a little extra work time before that starts to happen. And because I never make a bagel variety that I could easily find at a Dunkin Donuts, I threw in some dried tart cherries just for fun. They add an extra fruity pop, but of course you can just make classic blueberry if you want. Also, this was the first time I made bagels with an electric mixer in a long time. Both ways are completely doable, but I forgot how easy the machine makes it, especially with the blueberries.

INGREDIENTS: (makes 8 bagels)
1 packet quick-rise yeast
1 tablespoon + 1 teaspoon sugar
1 1/2 teaspoons salt
1 1/2 cups warm water
3 1/2 - 4 cups bread flour
1 cup fresh blueberries, frozen for 1-2 hours (Don't just buy frozen blueberries.)
1/3 cup dried tart cherries

DIRECTIONS:
1. Make the dough in a mixer or by hand. Stir warm water into the yeast and sugar and let sit for 5 minutes.
2. Add salt and flour, 1/2 cup at a time. Stop after adding 3 1/2 cups of flour. Save the rest for later.
3. Knead the dough until everything is well combined. Now, knead in the cherries and blueberries. Here is where the machine will be your best friend. This should requite 6-8 minutes of kneading.
4. After adding the blueberries, the dough will be stickier than bagel dough usually is. To compensate, gradually add more bread flour until the consistency is normal. If this is your first bagel recipe, that should be about another 1/2 cup, bringing the total amount of bread flour to 4 cups.
5. Knead the dough into a big ball, place it in a new, greased bowl, cover with a towel, and let rise for an hour.
6. Transfer the risen dough to a floured surface and gently press it into a slightly flattened circle. Cut it into 8 wedges.

7. To form the bagels, roll each wedge into a ball, push your thumb through the middle of it, and stretch/twirl it until the hole is 1/3 of the diameter.
8. Cover the formed bagels and let them rise for another 30 minutes. During that time, boil a large pot of water, and preheat the oven to 425.
9. After the second rise, boil the bagels for one minute per side. Don't worry, they will float.
10. Finally, bake the bagels on a lightly greased baking sheet at 425 for about 20 minutes.
They're best to eat fresh, so freeze any that won't be eaten within 24 hours. To revive them, microwave them on defrost for one minute, slice, then toast on low.
Enjoy, and look out for new posts throughout the week!

Molten Lava Cake

      This decadent dessert was one of my childhood favorites. I remember several chain restaurants that had versions of it, and how I would purposely not finish my dinner in order to save room for it later.  My younger self was fascinated and perplexed by how exactly they got the lava inside the cake. I thought it was magic. Now it's almost funny to know how simple it really can be. You just don't bake it all the way. There are other ways to do it, but this is definitely the simplest. This recipe only makes two servings because I made it for just my dad and I as a Father's Day present.

INGREDIENTS:
2 tablespoons butter
1/3 cup brown sugar
1/4 cup semisweet chocolate chips
1 egg + 1 egg yolk
a pinch of salt
3 tablespoons flour
powdered sugar for dusting

DIRECTIONS:
1. Preheat oven to 400 and grease 2 individual ramekins (or oven-safe mugs).
2. Melt the butter and chocolate chips in the microwave, then cool slightly.
3. In a medium bowl, beat the eggs with the brown sugar and salt. Next, mix in the butter and chocolate. Finally, add in the flour.

4. Fill the ramekins and bake them. You can adjust the baking time according to just how molten you want them to be. When done, a toothpick halfway to the center should come out clean, but the middle should still be runny. Start with at least 15 minutes, then just cook them to your liking.
5. Dust with powdered sugar on top and enjoy!


Come back tomorrow for the next installment in one of my favorite series!


Friday, June 13, 2014

Chocolate Brownie Pear Tart

      This recipe happened by accident, but sometimes the best ones do. One day I asked my dad to get peaches at the store just to snack on. Well, he came back with pears. I don't usually like to eat fresh pears because they generally seem like a less cool version of apples, but as I discovered with this delicious cheesecake, pears are actually pretty good when transformed into a dessert. The cheesecake is still my favorite, but this chocolaty creation is great too. It has a lot going on--a cookie crust, fruit, and a gooey brownie-like filling, but somehow it works really well.

INGREDIENTS: (for a 9inch tart pan)
Crust:
1 1/3 cup flour
2 tablespoons sugar
2 tablespoons ground almonds
1/2 teaspoon salt
1 stick of cold butter, cubed
4 tablespoons cold water

Filling:
2 pears, peeled and sliced
1/2 cup sugar
3 tablespoons flour
6 tablespoons butter
3 tablespoons semisweet chocolate chips
1 teaspoon vanilla

DIRECTIONS:
1. Preheat oven to 350 and grease and flour the tart pan.
2. Make the crust in a food processor or by hand. Cut the cold butter into the dry ingredients until you get a pebbly consistency. It should stick together when you pinch it, but it will seem rather dry. Add the water in last.
3. Pour the loose crust mixture into the tart pan and form the crust by pressing it along the bottom and up the sides. No rolling needed for this one. Bake the crust by itself at 350 for 10 minutes.
4. Prepare the pear slices and place them in an even layer over the baked crust.
5. You can make the filling either on the stove or in the microwave. Melt the butter with the chocolate chips, let it cool, then beat in the sugar, flour, vanilla, and egg.
6. Pour the filling evenly over the pears.
7. Bake at 350 for about 30-35 minutes or until the top is set. The middle will stay gooey because of the fruit. Chill and serve.
It's like a pie and a brownie, but it has fruit in it so it's good for you. Right?

Thursday, June 12, 2014

Sour Cream and Onion Crusted Chicken

     Today's recipe is another super simple dinner idea. In fact, you probably don't even need a recipe to make it.  I think people are always looking for different ways to make chicken, and this is an easy one to add to your repertoire.  We've all heard of potato chip chicken, but this variation is a little more fun.

INGREDIENTS:
4 chicken breasts
about 1 cup of crushed sour cream and onion chips
1/4 cup flour
1 egg

DIRECTIONS:
1. Preheat the oven to 375 and spray a baking dish.
2. Set up your assembly line with the flour in one dish, the beaten egg in the next, and the crushed chips in the last.

3. Lightly coat each piece of chicken in flour, then dip it in the egg, and then completely coat in in potato chip pieces.
4. Bake at 375 for 35-45 minutes.

Enjoy and come back later this week for another dessert!


Sunday, June 8, 2014

Stuffed Bell Peppers

     As I promised in yesterday's post, today I'm sharing a really delicious and simple dinner. You can make stuffed peppers with all kinds of different fillings, but this one is a good baseline recipe. Served with a little extra rice on the side, they make a hearty meal that looks a whole lot fancier than it really is!

INGREDIENTS:
6 bell peppers---Choose ones that can stand upright.
1lb ground beef
1/2 large onion
1 clove of garlic
1 14oz can of diced tomatoes
about 1 1/2 cups of grated pepper jack or Monterrey jack cheese
2 cups brown rice (Save some for serving on the side.)
salt, pepper, and a light sprinkling of cayenne pepper

DIRECTIONS:
1. Preheat oven to 375. Chop garlic and onion. Slice the tops of the peppers about 1/2 inch from the stem, and clean out the seeds. Grate the cheese now too, and start the rice.
2. In a lage pan, brown the beef, then add the onions and cook until clear.
3. Add the garlic, tomatoes, and seasoning and lower the heat.
4. When the rice is done, mix in some of that until most of the tomato juice is absorbed (about half). Last, turn off the heat and stir in about 2/3 of the cheese, leaving enough to cover the tops of the peppers later.
5. Use a tablespoon to fill each pepper all the way to the top. Then cover each with more cheese.

6. Bake at 375 for at least 30 minutes. Serve with remaining rice.


Enjoy, and come back tomorrow for dessert!

Saturday, June 7, 2014

Quickie: Biscuits with Pancetta and Cheese

     It's been a really long time since I've done one of these fast, simple, semi-hommade recipes. It's not really a recipe, just a fun spin on one of everyone's favorite store-bought shortcuts, those delightfully flaky biscuits that come conveniently in a can.  Of course these are a great addition to any dinner just as they are, but they also have endless possibilities and are second only to the canned crescent roll. With a little bit of fancy ham and cheese, you can completely reinvent them.

INGREDIENTS:
1 can of 10 flaky biscuits
10 slices of pancetta (or prosciutto)
10 slices or cubes of pepper jack (or Monterrey jack) cheese

DIRECTIONS:
1. Preheat the oven according to the directions on the can and spray a muffin tin with Pam.
2. Gently flatten each biscuit, place them in the muffin tin, and press the dough up the sides to create a little cup.
3. Wrap a piece of pancetta around a cube of pepper jack cheese (or roll it with a slice of cheese) and tuck it into the middle of each biscuit cup.
4. Bake according to the directions on the can, then carefully take them out of the pan and enjoy.
Come back tomorrow for this entire dinner recipe!

Friday, June 6, 2014

Brookies

     I'm really excited today because I finally found a recipe for chewy chocolate chip cookies that I actually like! But I didn't stop there. I asked myself what could be better than a warm chewy chocolate chip cookie and the clear answer was a warm chewy chocolate chip cookie attached to a warm chewy brownie, also known as the brookie. It's a double whammy of American dessert classics. I think each of the two doughs that make up the brookies would be great on its own too. In fact, the chocolate chip portion will be my new go-to.

INGREDIENTS: (makes 18 brookies, plus a couple extra chocolate chips)

Brownie dough:
2/3 cup flour
1/4 teaspoon baking powder
1/4 teaspoon salt
3 tablespoons butter
2 tablespoons semisweet chocolate chips
1/2 cup sugar
1 egg
1/2 teaspoon vanilla

Chocolate chip dough:
1/3 cup sugar
1/3 cup brown sugar
5 tablespoons butter, softened
1/2 teaspoon vanilla
1 egg
1 cup flour
1/2 teaspoon baking soda
1/4 teaspoon salt
3/4 cup semisweet chocolate chips

DIRECTIONS:
1. Spray or line cookie sheets and preheat oven to 350.
2. Make the brownie dough first. Mix the dry ingredients in a medium bowl. Then, melt the butter with the chocolate chips in the microwave. Let that cool, then stir in the egg and vanilla. Finally, stir in the dry ingredients. Set aside.
3. Now make the chocolate chip dough. In one bowl, mix the flour, baking soda, and salt. In another bowl, beat the butter with both sugars until fluffy.  Next, add the vanilla and egg to the butter and sugar.   Gradually stir in the flour mixture. Finally, fold in the chocolate chips.
4. Before assembling the brookies, it may help to chill both doughs in the fridge for a few minutes. Start with the brownie dough, and use a small scoop or a spoon to form little dough balls. Place them on a cookie sheet with plenty of room.
5. After you use all the brownie batter, clean the scoop, and do the same thing with the chocolate chip dough. Place these dough balls right next to the brownie ones, making sure they are the same size, even if you have dough left over.

5. Gently push/pinch the two doughs together, and then roll each cookie in your hands to make sure the  two halves are stuck.

6. Bake at 350 for 10 to 12 minutes.

Enjoy these with a cold glass of milk, and come back tomorrow for a creative dinner idea!

Wednesday, June 4, 2014

Baked Paprika and Parmesan Chips

     Today I learned something very surprising. I learned that baked potato chips don't have to taste like a bad excuse for real ones. I've actually been experimenting with healthy homemade chips for a while. I've made them out of zucchini, eggplant, and kale, all with great results. But for some reason, I just assumed that if I tried making potato chips this way, they would somehow fall short. Since I had only a couple of leftover potatoes, I decided to give it a try anyway, and I know a lot of people say this about baked chips, but I really mean it when I say that you can't tell the difference. Well, I take that back. You can tell a difference, but the homemade ones are better. The key to a good result is getting very thin slices of potato, which I think would be impossible to do without a mandoline slicer. As for the seasoning, I just sort of made it up, and I'm excited to try different flavors in the future.

INGREDIENTS:
2 large potatoes (or just use whatever kind you have already)
1/4 cup olive oil
1/2 teaspoon salt
1/2 teaspoon pepper
1/2 teaspoon paprika
2 tablespoons grated parmesan

DIRECTIONS:
1. Preheat oven to 425 and line baking sheets with parchment or foil.
2. Wash the potatoes, leave the skin on, and carefully slice them on a mandoline slicer.
3. In a small bowl, mix the salt, pepper, paprika, and parmesan into the oil.
4. Lay the potato slices on the baking sheets in a single layer, and brush each side with the oil mixture.
2. Bake at 425 until the chips are browned and crispy. Flip them occasionally. Start with 20 minutes, at which point the smaller slices could be done, and then check the rest at least every five minutes. Because all the slices are different sizes and the ones near the edges of the pan will cook faster, there's no way to have them all done at the same time. The last ones were done after about 40 minutes. Each time you check, take the done ones and let them drain on a paper towel.
One final note, try not to make more chips than you will eat at one time. The tradeoff for having healthier, homemade chips is that there are no preservatives to keep them fresh and crunchy for a long time. But other than that, they're perfect! Enjoy, and come  back tomorrow for another sweet treat!

Tuesday, June 3, 2014

Buttermilk Waffles with Peach Sauce

     Today, It's time for one of my very rare breakfast posts. This is something I didn't really plan out, but just made because I didn't know what else to do with the buttermilk left over from this cupcake recipe. Plus, I sometimes feel like I need to post some more basic recipes, as much for my own future reference as for yours. Now, this will be my go-to waffle recipe (because I'm just not a pancake kind of girl.) I like the thin kind because I've grown up with the same thin, heart-shaped waffle maker my whole life. Thick or thin, this recipe should make about 4 servings. Also, I'm not a huge fan of using large amounts of maple syrup (I know, I'm weird) so I decided to make a quick fruit topping. In all honesty, I used nectarines instead of peaches because that's what I had, but they worked just fine. Since I also had some leftover bacon from the recipe above, I then transferred my peach sauce to another bowl and fried the bacon in the leftover sweetness in the same pan.

INGREDIENTS:
Waffles:
1 3/4 cup flour
2 teaspoons baking powder
1 teaspoon baking soda
1/2 teaspoon salt
2 tablespoons sugar
1 3/4 cup buttermilk
2 eggs
2 teaspoons vanilla
1 stick of butter, melted
about 1/2 cup of milk

Peach sauce:
4 peaches, peeled and diced
4 tablespoons brown sugar
2 tablespoons butter
6-8 teaspoons brandy (optional)

DIRECTIONS:
1. Make the sauce first because once you start cooking the waffles, it's hard to multitask. Chop the peaches, cook them over medium heat in the 2 tablespoons of butter. Add the brown sugar and brandy, and let it boil for a few minutes until the consistency gets thick and syrupy.
2. In a medium bowl, whisk together all the dry ingredients for the waffle batter. In another bowl, whisk together only the eggs, vanilla, melted butter, and buttermilk.
3. Mix the wet ingredients into the dry. At this point, it won't be runny enough yet, so add about 1/2 cup of regular milk, until it gets to a manageable consistency. I just like to do this adjustment step last because it allows for more control.
4. Cook the waffles in your waffle iron, top them with the sauce, and enjoy!
Make these this weekend! And come back soon for more recipe ideas!

Sunday, June 1, 2014

Lemon and Basil Sherbet

     I think it's a safe assumption that ice cream is one of many people's favorite parts of summer. Going out and buying it is great, but if you're feeling particularly adventurous, getting an ice cream maker can give you endless freedom to invent flavors that you can't find anywhere else, like mango or blackberry. I understand that the majority of my readers don't have ice cream makers at home or may think it's pointless to get one, but for me, in the summer, it's very necessary, and it's like my favorite toy. Making a batch is an all day project, but depending on the recipe, it can be really simple. I used to love the really rich egg and cream based varieties, and while I still do, this year, I want to challenge myself to come up with some healthier versions. I've tried recipes with nondairy milk bases, and they were ok, but texturally not the best. Eventually, I want to get to the point where sorbet is enough for me, but for now, I'm trying sherbet as a stepping stone to that. Lemon sherbet is a classic. It's light, refreshing, and everybody likes it. But add a little hint of basil, and it's perfection. Initially, I was concerned that some people wouldn't get this combination because maybe not everyone shares my love of basil, but after tasting the finished product, I'm convinced that it will be a hit. The basil flavor is very mild. It's just a hint, but it's the perfect complement. It just tastes like summer.

INGREDIENTS:
about 1 cup of loosely packed fresh basil
1 cup sugar
3 large lemons (1/2 cup of juice and zest of 2)
2 3/4 cup whole milk


DIRECTIONS:
1. Tear the basil leaves, and in a medium bowl, rub them with the sugar for about 5 minutes to really infuse their flavor.
2. Squeeze 1/2 cup of lemon juice, stir it into the bowl, cover it, and let it sit out for an hour. This recipe takes even more time than most ice creams just because the basil needs time to marinate with all the ingredients.


3. Now stir the milk into the lemon juice. Grab another bowl, and run it through a fine strainer to remove the basil leaves and any stray lemon seeds. You will have to work it through the strainer with a spoon and be patient until all of the milk runs through. Finally, stir in the lemon zest, and chill in the fridge for at least 3 hours.

4. After the first chill, run the mixture in an ice cream maker according to the manufacturer's directions (about 20 minutes). Then transfer it to an airtight container and freeze for at least 3-4 hours before serving.
Enjoy, and be sure to check this page regularly for the insane amount of new recipes I'll be posting this summer!

Saturday, May 31, 2014

Chocolate Cupcakes with Caramelized Bacon

     Today's recipe is rich, decadent, and not healthy at all. Its title may sound strange at first, but the use of bacon in desserts is becoming a culinary trend. Bacon chocolate chip cookies and maple bacon milkshakes come to mind. To be honest, I'm not usually a huge fan of American bacon, but there are few things I enjoy more than coming up with ways to turn foods people hate into foods they love. And in my experience, adding sugar is a very effective way to accomplish that. In this case, the result is oddly delicious, and would make a perfect party treat. But why add more calories to an already indulgent cupcake? Because 'Merica, that's why! So in a way, it's a celebration of my homecoming.

INGREDIENTS (makes 12 cupcakes)
6-8 slices of bacon
1 cup flour
1/3 cup cocoa powder
1 cup granulated sugar
1 teaspoon baking soda
1/2 teaspoon baking powder
1/4 teaspoon salt
1 egg
1/2 cup cold black coffee
1/2 cup buttermilk
1/4 cup vegetable oil
brown sugar for caramelizing the garnish bacon

for chocolate buttercream frosting:
1/4 cup semisweet chocolate chips, melted
2 sticks of butter, softened
1 teaspoon vanilla
about 2 cups powdered sugar
a splash of milk

DIRECTIONS:
1. Preheat oven to 375 and line muffin tins with cupcake liners.
2. Take 4-5 slices of the bacon, thoroughly cook them in a pan, drain, and crumble them into tiny pieces. Set aside.
3. In a large bowl, mix all of the dry ingredients for the cupcake batter.

4. Once thoroughly combined, make a well in the middle, and add the egg, coffee, buttermilk, and oil. Mix just until combined. Then, stir in the bacon bits, and spoon the batter evenly into cupcake tins, about 3/4 full.
5. Bake at 375 for 20 minutes, Then cool them in the pans on a wire rack while you prepare the frosting. Lower the oven temperature to 325.
6. To caramelize the remaining slices of bacon, put them in a small bowl and coat them with brown sugar. Then lay them flat on a baking sheet lined with foil or parchment paper. Bake them until the look caramelized and crispy. For me, this took about 20 minutes, but you have to keep an eye on it because it can burn quickly. When it's done, let it cool completely.
7. To make the frosting, beat the butter with an electric mixer for a few minutes until fluffy, then add the vanilla and melted chocolate. Continue to mix and gradually add powdered sugar until you get the desired taste and consistency.
8. Frost the cupcakes using whatever method is easiest for you. For me, that means piping it on with a pastry bag. It's an extra step, but it gives people like me who lack fine motor skills a lot more control and a pretty result.
9. Finally, carefully break or cut the slices of caramelized bacon into 2-inch sections and stick on into the frosting on top of each cupcake.
Enjoy, and come back tomorrow for this summer's first inventive ice cream flavor!

Friday, May 30, 2014

The Best German Potato Salad

     I'm back! I have been home for two weeks now, and as I expected, I completely crashed for the first one. After transitioning from the very exciting, over-stimulating experience that is life abroad, I knew I wasn't going to want to do a thing for the first few days. Plus it didn't help that I caught a cold immediately after landing. Apparently I'm allergic to America. And reverse culture shock is sort of a thing. I think it gets a little exaggerated, although there is a little Germany-shaped hole in my heart right now. However, I am enjoying all the things that I missed while I was away. And of course I'm having fun sharing all the European things that I could bring back with me with my family, most of which are recipes.
     Yesterday, I rediscovered the joy of spending the better part of my summer days in the kitchen, just like I used to, and I have some really cool things to share. But today, I'll kick it all off with something really simple that reminds me of my second home: Schwäbischer Kartoffelsalat or Swabian potato salad. Now I don't care for the typical American potato salad, mainly because I have issues with our tendency to slather various foods with mayonnaise and call it "salad." When most Americans thing of German potato salad, they expect something similar to the American version, only slathered in mustard instead of mayonnaise. The different regions of Germany are very diverse, and there really is no one type of German potato salad, but I can say that the Swabian kind that I have come to love is not like that at all. No mayonnaise, no mustard, just delicious simplicity.

INGREDIENTS:
None of this really needs to be measured, but here's a guideline for 4-6 servings

4 large potatoes, or more smaller ones
1/2 medium onion, finely chopped, in any variety you like
1/2 cup chicken or vegetable broth
3 tablespoons olive oil
3-4 tablespoons apple cider vinegar
salt and pepper
bacon bits (optional)
chopped chives (optional)

DIRECTIONS:
1. Wash and peel the potatoes. Boil them whole until done (about 20 minutes), but be careful not to overcook them.
2. Drain the potatoes and rinse them in cold water.
3. Once they are safe to touch, use a pairing knife to slice them as thinly as possible.
4. In a medium bowl, gently toss the potato slices with all other ingredients. Taste test and adjust.
5. This is traditionally served hot, but it's good cold too.
     It's so simple, but that's what makes it perfect! Enjoy, and come back tomorrow for something very different and very American!


Friday, May 16, 2014

Saying (a Temporary) Goodbye

     Today I have to find a way to summarize what the last four months have meant to me, and honestly, I have no idea where to start. I feel like everything I could possibly say has been said a million times before, and yet I feel compelled to say it again because I really wish that more people would take that leap of faith and go study abroad. No words can completely describe how amazing an experience it is or how profoundly it changes you.  It really would be a shame to miss out on this opportunity, so here is my final attempt to convince the masses.
    First there are the tangible things--all the travel, events, and adventures you get to have. In addition to the two 10-day class trips that are jam-packed with activities, we had over 25 other events, including many free meals, concerts, and excursions. During the semester, they keep you busy. And of course that doesn't even count the long weekends and spring break, when you can just go anywhere and everywhere.
Like Prague:
and Paris:


     What's arguably even more important are the intangible things you gain from this experience. You can meet people from all over the world. You'll get completely comfortable hearing multiple languages, often spoken in the same room. You'll learn that there is more than one good way to do pretty much anything. You'll become a better problem-solver.  You'll get over all of your dumb little fears.  You'll learn how to do laundry, shop for groceries, and cook. (But hopefully you already do those things.)  
     But what has by far meant the most to me is getting to wake up every single day and be really excited about life. I've become much more independent and confident. After you successfully navigate Europe pretty much on your own, you'll feel like you can do anything. Because you can. If you think about it, there aren't a whole lot of things that are harder than packing up your life and moving to another country, so once you've done that, suddenly, the things that used to scare you just don't anymore. And more importantly, you come to the realization that it's the scary things in life that end up being most worthwhile.
     Tomorrow, I have to say goodbye to Reutlingen, but I'm in a different position than most of my classmates.  This goodbye will be easier for me because it is only a temporary one. Because I get to come back in three months, I'm mostly just excited to go home right now. But come August, it'll be time to put everything I learned to good use again. I guess more than anything else, today I feel grateful, for the transformative experience this semester has been, for the relaxing summer ahead, and for the opportunity to spend another year right here where I belong.

Tuesday, May 13, 2014

Birthday Post: German Quiche

     No, it's not my birthday. That already happened, but this is even more exciting! Exactly one year ago, this blog was born. On that day, I posted what is still one of my favorite recipes, fresh triple berry pie. Despite the bad newbie photography, I'll always be proud of that post and of the fact that I actually had the guts to start this and then commit to it. I remember how I waited months before even telling my family I was doing this, for fear they wouldn't take it seriously. And I waited even longer to make a Facebook like page because I was afraid no one would "like" it.  I knew that I couldn't compete with the famous food bloggers, and I still can't, but when I started, I decided that as long as 5 people read it, it'd be worth it. Luckily this community has grown bigger than that, and I feel that I'm at least starting to accomplish my greater goal of teaching people not to fear learning to cook.
     And now for the actual recipe portion of this post, the Schwäbischer Zwiebelkuchen. Don't let the name scare you, it's basically quiche Lorraine, which was actually most likely invented by Germans.  Everybody wants to take the credit. Swabia, the region of Germany that I now call home, is really close to France, so there's probably a little cultural overlap in this case. But no matter what you call it, this quiche/cake/pie is extremely delicious. I made one big one just for myself, ate it for literally every meal for 3 days, and didn't get sick of it. In fact, I'll probably make another one soon. (I think we established long ago that I have no shame when it comes to food. And also very little in most other areas of my life.) But anyway, this recipe is good. Really good. I didn't even plan to make it my anniversary post, but it deserves the honor.

INGREDIENTS:
Shortcrust:
1/2 cup sugar
1 3/4 sticks butter, softened
1 egg
pinch of salt
pinch of baking powder
2 1/2 cups flour

2lbs. onions, finely chopped
a slab of bacon, chopped
1 1/2 cups sour cream
4 eggs
2 tablespoons flour
2 teaspoons salt
1 teaspoon pepper

DIRECTIONS:
1. It's best to prepare the crust dough a few hours early, chill it in the fridge, then take it out 30 minutes before use. To make it, beat the butter, sugar, egg, and salt until fluffy. then gradually add the dry ingredients. Mix it with a machine or by hand, but it does need a little bit of hand kneading at the end. It should come together nicely.
2. Preheat the oven to 400 and grease and flour a 12inch springform pan. Chop the onions, then the bacon. Slices of bacon work too, but the raw slab is more German and more like ham, so I prefer that.
3. Fry up the bacon in a pan, then add the onions. Cook them in butter on medium-high heat until they look clear, and then lower the heat and let them caramelize for 30 minutes. Remember there's a fine line between caramelized and burnt. 
4. In a large bowl, make the "batter." Mix together the flor, salt, pepper, eggs, and sour cream until smooth. Then stir in the onions and bacon.
5. Roll out the crust dough and fit it into the pan. Make sure it goes all the way up the sides, but leave the edge unfinished to give it that rustic look.
6. Pour the batter into the crust and bake at 400 for 45 minutes to an hour, until the middle is set. I've decided that my weird German oven is more like a broiler, so that's why I can't give good estimates on baking times anymore. 


     Just because I really want you to make this and love it as much as I do, I'll even condone substituting pre-made pie crust. That way, it's super easy. Have it for whatever meal you want. It's always a good time for quiche.
     And now for my super special announcement: I'm going back to the good old days of daily recipes! I'm not sure yet, when I'll start because I'm leaving Germany for home on Thursday. It would have been perfect to start the daily posts again exactly on the anniversary, but I will need some time to recover from my flight and settle back in at home. That could be two days or two weeks, I don't know. But I will get back into my old rhythm sometime soon. That being said, because I'm one year older and wiser now, I'm a lot more concerned with quality than quantity. I'm not going to force myself to come up with something great every day. Yes, I will cook every day, but they can't all be winners, and I could post mediocre things, but that's not really worth. So if and when that happens, maybe I'll just post some random thoughts on whatever is inspiring me at the time. I don't know if that would interest anyone, but I have been wanting to try it because I have a lot of thoughts, and sometimes I feel like I put myself in a box with the food/travel themes. So we shall see. 
     I want to thank all of my readers for your support and encouragement. Thank you for following me around the world. I really hope that you try some of these recipes and enjoy them as much as I do. Because of you, this year has been a blast. Let's continue to grow this little community. It's gonna be a fun summer, followed by another year of European adventure. I can't wait!

Tuesday, May 6, 2014

The Best Things I Ate: The European Tour

     It's time for the last installment of "The best things I ate."  Check out parts 1 and 2 if you haven't yet. This time, instead of dishes from Germany, I've collected all of my favorite meals from various countries I visited over spring break. Since this post required extensive research, it will be rather long, but I have to share these things because they are such an important part of why I love travel, and they are what inspire me to create new recipes of my own. Whether I'm at home or halfway around the world, I try to branch out and try new things, as well as authentic classics, and here, you'll see a good mix of both, organized by city.

Prague:
This was the first dinner I had in the first city of break, and it was a great way to kick it all off! It was roast pork with horseradish mashed potatoes and a gorgeous gravy. It was classic Czech food with a little added elegance. Another reason to love Prague is that even fancy restaurants are ridiculously cheap because of the exchange rate!


This little treat is something I grew up eating at home. Kolacky are little Bohemian cookies filled with jelly or cream cheese that come in all shapes and sizes. I saw these at a bakery stand at a local festival and just had to have a real one!
Budapest:
For even cheaper fancy food, this is the place for you! This was my birthday dinner, chicken with beetroot risotto. I'm not really a fan of beets, but I am a huge fan of risotto, so I decided to take a risk and order it. And not only does it look beautiful, it tasted perfect too!

Vienna:


A long time ago, I did an entire post about my favorite foods in Vienna, but one thing I regretted missing out on the first time was some real Wiener Schnitzel. So this time, I found a restaurant that was really popular with the locals and finally had some. Some of my friends got the giant version that was bigger than the plate, but I opted for this one to get the sides. That way, it didn't look entirely like a heart attack on a plate. At least there was some lettuce.

Venice:

Unlike Prague and Budapest, food in Venice can get pretty expensive. But one thing that's always a deal is pizza. Honestly, my favorite pizza in the world is still Chicago style deep-dish, but for authenticity's sake, this one was pretty good too. But it was a struggle to eat with a knife and fork.

Rome:
It was here that I first learned how to eat like an Italian. Apparently, the giant bowl of pasta is only the first course, and you're supposed to have room for a meat course after that. I usually just picked one or the other, but this pesto was my favorite pasta course, mostly because I believe you can never have too much basil.

Cinque Terre: 
As a general rule, whenever I'm lucky enough to go to a restaurant where I can see the ocean from my table, I order fish. And that's almost the only time I order fish. This was the first time that I ever got one with the head still attached, but after respectfully laying a piece of lettuce over the face, I thoroughly enjoyed this meal.
     So far, I haven't mentioned any restaurants by name, but I feel compelled to for this next one. Based on rave reviews from Rick Steves and Tripadvisor, I had to try Il Pirata in the tiny town of Vernazza. I'm sure all their food is great, but I specifically wanted to go for breakfast.
First, there's this little cup of wonderful. The owner gave us a little free sample, describing the mix of fresh strawberry slush and whipped cream as "the Italian yoghurt." That little taste was not enough. And just the fact that this is considered just like yoghurt here is just another reason why I love this country.
Finally, yes, I did order a cannoli for breakfast. I had to do it, and it was the best one I've ever had. And now I know better than to order a pre-filled one. These are filled only after you order them so that they stay delightfully fresh and crunchy.

     So that's how I ate my way across Europe. Next week, I'll write my last Reutlingen post as I prepare to go home for the summer. And by the way, this is the 150th post on Spoonful of Zucker. This blog has become exactly what I envisioned, a perfect mix of fabulous food and fabulous places. Thank you all for coming along for the ride this year. I can't wait to see where it will take us in the next one!